Summary: There are some cost effective but simple ways for you to import Sony HXR-NX100 XAVC S footage into Adobe Premiere Pro CC/CS6, while enjoying the stunning video quality and faster speed.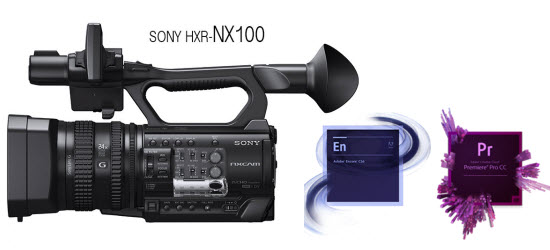 The new Sony HXR-NX100 XAVC S brings high-quality performance, adaptability, and ease of use to a compact, handheld body. The camcorder features a single Exmor R sensor with Full HD 1920x1080 resolution, Sony G lens with 12x optical zoom range, and a 24x Clear Image Zoom. With it, you can capture videos in XAVC S, AVCHD 2.0 or DV Recording Codecs. However, many folks are having problems when importing Sony HXR-NX100 XAVC S footage to Premiere Pro CC or Pro CS6.Obviously, the new XAVC S codec is not good for Mac editing, it takes long time to render, so we can't edit Sony HXR-NX100 XAVC S files smoothly in Adobe Premiere Pro CC/CS6 or After Effects CC, FCP X, FCP 6/7, iMovie, Avid Media Composer, DaVinci Resolve, Kdenlive, Keynote, Apple Aperture 3 and so on.To avoid these problems or limit, it will be better to convert Sony HXR-NX100 XAVC S codec to a more "edit" friendly codec for Premiere Pro CC/CS6/CS5.5/CS5/CS4. Pavtube HD Video Converter for Mac is highly recommended here, which can be used as a professional XAVC S Video Converter under Mac OS X Leopard (10.5), Snow Leopard (10.6), Lion (10.7), Mountain Lion (10.8), Mavericks(10.9), Yosemite(10.10), El Capitan(10.11). With it, you can effortlessly transcode XAVC to MPEG-2 for Adobe Premiere Pro CC/CS6 with faster speed and keep original quality at the mean while. For those who need to work XAVC S files on Windows, please get HD Video Converter.
Download the Mac XAVC S Video Converter software and follow the guide to finish the conversion task.
The new Sony HXR-NX100 XAVC S brings high-quality performance, adaptability, and ease of use to a compact, handheld body. The camcorder features a single Exmor R sensor with Full HD 1920x1080 resolution, Sony G lens with 12x optical zoom range, and a 24x Clear Image Zoom. With it, you can capture videos in XAVC S, AVCHD 2.0 or DV Recording Codecs. However, many folks are having problems when importing Sony HXR-NX100 XAVC S footage to Premiere Pro CC or Pro CS6.Obviously, the new XAVC S codec is not good for Mac editing, it takes long time to render, so we can't edit Sony HXR-NX100 XAVC S files smoothly in Adobe Premiere Pro CC/CS6 or After Effects CC, FCP X, FCP 6/7, iMovie, Avid Media Composer, DaVinci Resolve, Kdenlive, Keynote, Apple Aperture 3 and so on.To avoid these problems or limit, it will be better to convert Sony HXR-NX100 XAVC S codec to a more "edit" friendly codec for Premiere Pro CC/CS6/CS5.5/CS5/CS4. Pavtube HD Video Converter for Mac is highly recommended here, which can be used as a professional XAVC S Video Converter under Mac OS X Leopard (10.5), Snow Leopard (10.6), Lion (10.7), Mountain Lion (10.8), Mavericks(10.9), Yosemite(10.10), El Capitan(10.11). With it, you can effortlessly transcode XAVC to MPEG-2 for Adobe Premiere Pro CC/CS6 with faster speed and keep original quality at the mean while. For those who need to work XAVC S files on Windows, please get HD Video Converter.
Download the Mac XAVC S Video Converter software and follow the guide to finish the conversion task.
 Other Download:
How to edit Sony HXR-NX100 XAVC S files in Premiere Pro CC/CS6?Step 1: Launch it and add XAVC S footage to the software by clicking "Add video" or "Add from folder" button.
Other Download:
How to edit Sony HXR-NX100 XAVC S files in Premiere Pro CC/CS6?Step 1: Launch it and add XAVC S footage to the software by clicking "Add video" or "Add from folder" button. Step 2: Click Format bar and choose output format. For editing Sony HXR-NX100 XAVC S in Adobe Premiere Pro CC/CS 6, Under "Adobe Premiere/Sony Vegas" and choose "MOV(AVC)(*mov)" as output format for editing in Adobe PP natively.
 Step 3: Hit on the "Convert" button and start to convert Sony HXR-NX100 XAVC S to Premiere Pro CC/CS 6 Mac conversion.When the conversion is done, simply click "Open" button to get the converted XAVC S videos. And then bring HXR-NX100 XAVC S footage into Premiere Pro CC/CS6 for smooth editing.Further Reading:
Summary: This step-by-step tutorial shows you how to convert MKV to Sony TV best accepted format with MKV to Sony TV Converter.
 The MKV is an open standard free container format, a file format that can hold an unlimited number of audio, video, subtitle tracks or picture in one file. This format offers a richer media experience than any other current format, this makes MKV a popular choice for making back-ups of DVD and Blu-ray discs that you could also play on a computer connected to a TV.
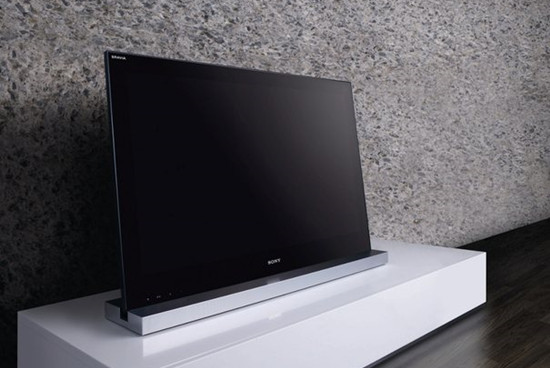
“I have bought a brand new Sony TV. The problem is that it does not recognize MKV video files. I’m able play AVI and MP4 formats, but not MKV videos. Can anyone help?”
According to Sony's official site, Sony TV support MKV format. However, in most cases, you'll find your MKV files can't be played on Sony TV. It's so strange, isn't it? There is a strong possibility that your MKV files contains DTS audio (Different MKV files are with different audio codecs). Sony TV has poor compatibility with DTS audio. In a case like this, you have to make audio stream in MKV files compatible with Sony TV. It sounds a bit complicated. Actually, it's very easy as long as you have a professional MKV to Sony TV converter.
Here, you can turn to Pavtube Video Converter, which is just the top MKV to Sony TV converter to convert MKV to Sony TV format. It can also convert other videos like MOV, FLV, Xvid, AVI, RMVB, RM, TS, VOB, 3GP, 3G2, OGV, MVC, DV, MXF, and etc to Sony TV. If you are running on Mac operating system, you can refer to the equivalent version-Pavtube Video Converter for Mac. This program ensures maximum editing quality and efficiency. What’s more, the additional video editor enables you to personalize videos before conversion.
See also: Easily Play MKV/HD MKV on Galaxy Note 5
The MKV is an open standard free container format, a file format that can hold an unlimited number of audio, video, subtitle tracks or picture in one file. This format offers a richer media experience than any other current format, this makes MKV a popular choice for making back-ups of DVD and Blu-ray discs that you could also play on a computer connected to a TV.
“I have bought a brand new Sony TV. The problem is that it does not recognize MKV video files. I’m able play AVI and MP4 formats, but not MKV videos. Can anyone help?”
According to Sony's official site, Sony TV support MKV format. However, in most cases, you'll find your MKV files can't be played on Sony TV. It's so strange, isn't it? There is a strong possibility that your MKV files contains DTS audio (Different MKV files are with different audio codecs). Sony TV has poor compatibility with DTS audio. In a case like this, you have to make audio stream in MKV files compatible with Sony TV. It sounds a bit complicated. Actually, it's very easy as long as you have a professional MKV to Sony TV converter.
Here, you can turn to Pavtube Video Converter, which is just the top MKV to Sony TV converter to convert MKV to Sony TV format. It can also convert other videos like MOV, FLV, Xvid, AVI, RMVB, RM, TS, VOB, 3GP, 3G2, OGV, MVC, DV, MXF, and etc to Sony TV. If you are running on Mac operating system, you can refer to the equivalent version-Pavtube Video Converter for Mac. This program ensures maximum editing quality and efficiency. What’s more, the additional video editor enables you to personalize videos before conversion.
See also: Easily Play MKV/HD MKV on Galaxy Note 5
How to Import MKV to EDIUS Pro 8 for Editing?
How to Compress MKV Files with Lossless Quality in Mac/Win?

 Other Download:
- Pavtube old official address: http://www.pavtube.com/video_converter/
- Amazon Download: http://download.cnet.com/Pavtube-Video-Converter/3000-2194_4-75734821.html
- Cnet Download: http://download.cnet.com/Pavtube-Video-Converter/3000-2194_4-75734821.html
How to watch MKV files on Sony TV?
Step 1: Download and have a quick installation. The trial version will have a watermark on your converted files. Except for that, there are no time limitation, no virus, and no unnecessary bundle apps while downloading. After that, click “Add Video” button to load MKV files. You can load several files at once thanks to “Add from folder” button.
Other Download:
- Pavtube old official address: http://www.pavtube.com/video_converter/
- Amazon Download: http://download.cnet.com/Pavtube-Video-Converter/3000-2194_4-75734821.html
- Cnet Download: http://download.cnet.com/Pavtube-Video-Converter/3000-2194_4-75734821.html
How to watch MKV files on Sony TV?
Step 1: Download and have a quick installation. The trial version will have a watermark on your converted files. Except for that, there are no time limitation, no virus, and no unnecessary bundle apps while downloading. After that, click “Add Video” button to load MKV files. You can load several files at once thanks to “Add from folder” button.
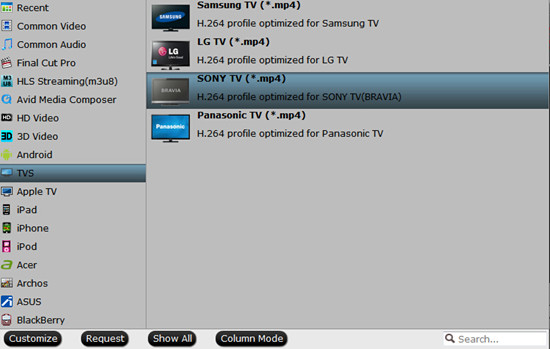
 Step 2: Here, you need to choose what you want the output to be. Click “Format” drop-down list, and then select output video format from the powerful converter. Here, you’d better choose “TVS>>SONY TV (*.mp4)”.
 Step 3: Adjust video and audio parameters, including the bit rate of video and audio, the codec of video and audio, video size, sample rate, frame rate, audio channels, etc., in the Profile Settings by hitting “Settings” button.
Step 4: Click “Convert” button to start the conversion work. You can get the generated files by clicking “Open” button.
Conclusion: If you don’t want to wait for the entire conversion process, you can tick off “Showdown computer when conversion completed” and go away to do other things.
Further Reading:
Step 3: Adjust video and audio parameters, including the bit rate of video and audio, the codec of video and audio, video size, sample rate, frame rate, audio channels, etc., in the Profile Settings by hitting “Settings” button.
Step 4: Click “Convert” button to start the conversion work. You can get the generated files by clicking “Open” button.
Conclusion: If you don’t want to wait for the entire conversion process, you can tick off “Showdown computer when conversion completed” and go away to do other things.
Further Reading:
Summary: Want to convert MKV to Samsung Smart TV for playing? This MKV video converter can help to convert MKV video to MP4 to meet all your needs.
 The MKV is an open standard free container format, a file format that can hold an unlimited number of audio, video, subtitle tracks or picture in one file. This format offers a richer media experience than any other current format, this makes MKV a popular choice for making back-ups of DVD and Blu-ray discs that you could also play on a computer connected to a TV.“My Samsung TV won’t play MKV files, I’ve tried using many ways to solve this problem but still can not work it out.”“I had an MKV file that was 1920*1080. I get an error saying the file can't be played on Samsung TV, if these files are in MKV format. How to deal with this problem?”“I have a Samsung TV connected to my home network, I want to play MKV files on it, However, Samsung said it didn't support it. I've tried changing the extension of the files from MKV to MP4 or AVI, but this doesn't work.”Though Samsung TV claims to support MKV files, sometimes we still can not solve the issues that Samsung TV won’t play MKV. This is probably because MKV files are with DTS audio and Samsung smart TV have bad compatibility with DTS audios. In order to play MKV DTS on Samsung, we need to convert MKV DTS to MP4 AC3, or other supported formats by Samsung Smart TV.Here Pavtube Video Converter just comes into being, this ideal Samsung TV Converter, which can convert all kinds of MKV files to Samsung Smart TV. There is no need for you to know which format is supported by Samsung TV, cause our professional Samsung TV Converter has set “Samsung TV” as an output format, which concludes all formats can be compatible with Samsung Smart TV. Other Download:- Pavtube old official address: http://www.pavtube.com/video_converter/- Amazon Download: http://download.cnet.com/Pavtube-Video-Converter/3000-2194_4-75734821.html- Cnet Download: http://download.cnet.com/Pavtube-Video-Converter/3000-2194_4-75734821.htmlHow to play MKV files on Samsung Smart TV?Step 1: Download and install the program. Click “Add video” on the main interface to load your files to the program. You can also drag the files to the program’s window list directly. This program can also support the batch video clips.Step 2: Click the “Format” bar to get the drop-down menu and you can get “TVS”. Choose “Samsung TV (*.mp4)” as best output format.
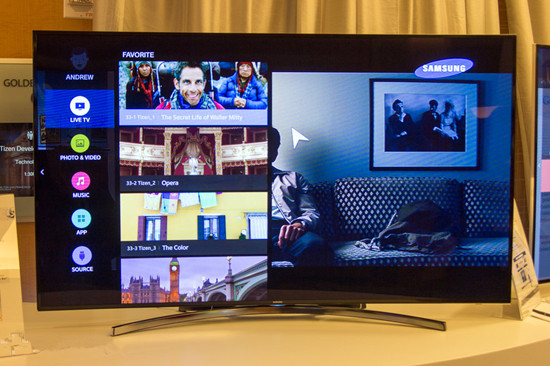
 Step 3: Click “Settings” button to customize the output video and audio settings by yourself. But if you are not good at it, you’d better use the default parameters, they will ensure you a good balance between file size and image quality basically. You can change the resolution, bit rate, frame rate as you need.Step 4: Specify output folder on your computer to save the output files. Click the “Browse” button to choose the path where you want to save the output files in. Click “Convert” button to finish converting videos to Samsung TV compatible format.Conclusion: When the conversion is finished, click “Open” to get the generated files. Now, there’s no need for you to worry about how to play MKV files on Samsung Smart TV without any hassles.Further Reading:
Summary: To import GX8 AVCHD/MP4 to Avid MC is actually a piece of cake. This guide lets you easily enjoy converting GX8 AVCHD/MP4 to DNxHD MOV.
 The black Panasonic Lumix DMC-GX8 is a sleek, compact mirrorless camera enabling versatile, multimedia recording. In addition to the versatile still shooting modes, the GX8 also supports recording 4K UHD (3840*2160) video in the MP4 format. Full HD 1080p/60 is also supported, in both MP4 and AVCHD formats. But there are a few issues when it comes to viewing, importing and editing GX8 AVCHD/MP4 in Avid Media Composer.“I want to buy Panasonic GX8. It can shoot video with AVCHD but wanted to check the better encoder. I’m working with Avid and it does not recognize the 4K file. How to solve this problem? How to import MTS video to Avid on Mac?”If we want to import and edit Panasonic GX8 AVCHD/MP4 in Avid MC, the result may let you down- these popular video editing programs won't open the 4K footage from Panasonic GX8 correctly. Maybe an upgrade version of editing software could help. Still stuck with unsuccessful attempts? Perhaps there is some required codec missing or it is an incompatible video file format.In this case, the easy workaround is to convert GX8 AVCHD/MP4 video to DNxHD, which is the best codec with best results when working with Avid MC. To finish the job, Pavtube HD Video Converter for Mac (review) would be the great help. The program can effortlessly encode/re-encode 4K H.264(MP4/MOV), XAVC, XAVC S, etc footage for smoothly importing and editing in various non-linear editing systems. Other Download:- Pavtube old official address: http://www.pavtube.com/hd-video-converter-mac/- Amazon Store Download: http://www.amazon.com/Pavtube-Video-Converter-Mac-Download/dp/B00QI9GNZS- AppStore Download: https://itunes.apple.com/de/app/pavtube-hd-video-converter/id502792488?mt=12- Cnet Download: http://download.cnet.com/Pavtube-HD-Video-Converter/3000-2194_4-76177786.htmlHow to import Panasonic GX8 4K video to Avid?Step 1: Launch the HD Video Converter on your Mac, and then click the “Add video” button to import your source files directly. In order to import several files at one time, you can click “Add from folder” button.
 Step 2: Click the “Format” bar to get the drop-down menu and you can get “Avid Media Composer>>Avid DNxHD (*.mov)” as best output format.
 Step 3: Click “Settings” button to customize the output video and audio settings by yourself. But if you are not good at it, you’d better use the default parameters, they will ensure you a good balance between file size and image quality basically. You can change the resolution, bit rate, frame rate as you need.Step 4: Now, click “Convert” and let it go. The program supports batch conversion. So if you have lots of files to convert, check “Shut down computer after conversion” and you can go away without keeping an eye on it.Conclusion: Once the conversion process shows in 100%, click “Open” to get the output videos. Create a project and start editing GX8 4K video in Avid MC with light speed.Further Reading:
Summary: In order to enjoy MKV files on iPod Touch 6 more easily, converting MKV to MP4 can be a great idea for you.This article will offer you an MKV video converter.
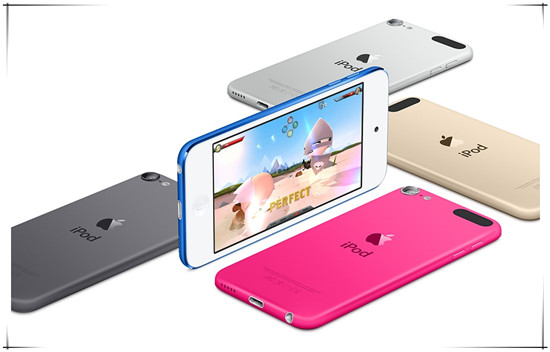 Apple’s newly released and much needed update to the iPod touch has seen the much maligned music and baby iPhone receive a new lease of life, once again making it a viable alternative for those that don’t want a cellular plan but like the idea of using iOS on something smaller than an iPad. We’re not sure why it’s taken Apple so long to get an update out the door, but now it’s here the iPod touch is worth consideration once again.iPod Touch 6 video playback:H.264 video up to 1080p, 30 frames per second, Main Profile level 4.1 with AAC-LC audio up to 160 Kbps, 48kHz, stereo audio in .m4v, .mp4, and .mov file formatsMPEG-4 video up to 2.5 Mbps, 640 by 480 pixels, 30 frames per second, Simple Profile with AAC-LC audio up to 160 Kbps per channel, 48kHz, stereo audio in .m4v, .mp4, and .mov file formatsMotion JPEG (M-JPEG) up to 35 Mbps, 1280 by 720 pixels, 30 frames per second, audio in ulaw, PCM stereo audio in .avi file formatAs it is shown above, MKV files are not supported by iPod Touch 6. If you want to enjoy MKV files on iPod Touch 6, you’d better convert your source files to iPod Touch 6 best accepted video format. Here you can depend on Pavtube Video Converter for Mac. This program can convert any video formats as you like to iPod Touch 6 supported foramts. Other Download:- Pavtube old official address: http://www.pavtube.com/video-converter-mac/- Amazon Store Download: http://www.amazon.com/Pavtube-Video-Converter-Mac-Download/dp/B00QIBK0TQ- Cnet Download: http://download.cnet.com/Pavtube-Video-Converter/3000-2194_4-76179460.htmlHow to convert MKV files to iPod Touch 6?Step 1: Download, install and launch the program, you can import the video files either by dragging and dropping directly into the main interface or by clicking “Add Video” or “Add from folder” button.
 Step 2: You can choose from a number of different formats displayed in the “Format” bar at the bottom. Here you’re suggested to choose “HD Video>>H.264 HD Video (*.mp4)” as output format.
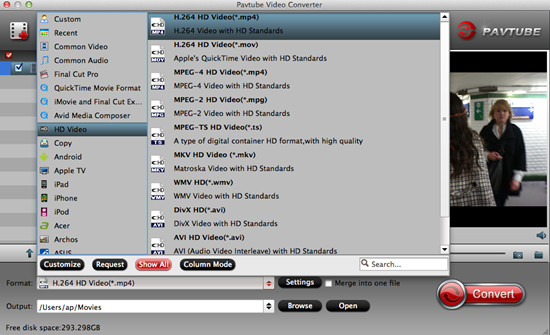 Step 3: Go back to the main interface, hit the big button “Convert” there.Conclusion: There is no need for waiting for a long time. We can receive the best output files nicely. After conversion, you can get the generated files by hitting “Open” button. Now, it’s easy to enjoy MKV files on iPod Touch 6.Further Reading: