Wednesday, January 27, 2016

Best Camera 2016: Edit Nikon D750 (16/18) MOV Files in FCP6/7/X

“First time user of Nikon D750. We have some footage to be edit in FCP on mac but FCP could not recognize H.264 mov files. Is there anyone also using Nikon D750?”

“Hi, I'm still getting an error when trying to import Nikon D750 footage into FCP X. Who can share a Nikon D750 plugin download link?”

“I'm going to shoot a project on HD with a Nikon D750. My DoP has given me some test footage, but I am unable to import the footage into Final Cut Pro 7?”

The D750 has a feature set unlike full-frame DSLRs its size. It uses the same autofocus and metering technology as the D4S and the D810 - Nikon's powerful 51-point AF system with 15 cross-type sensors and 3D Color Matrix Metering III with a 91,000-pixel RGB sensor. Simultaneously record uncompressed and compressed Full HD 1080 footage at 60/50/30/25/24p. 

The point here, you will find it a painful experience to import and edit Nikon D750 h.264/MPEG-4 footage in FCP X software. I did a lot search on net and find the method is transcode Nikon D750 H.264 1080p MOV into Final Cut Pro best compatible Apple ProRes format on Mac.

Here you just need to get a Nikon MOV to FCP Converter. Pavtube Video Converter for Mac(read the review) just what you need. With this Nikon MOV Converter, you can effortlessly transcode H.264 1080p MOV to ProRes 422/ProRes4444, which will create an Final Cut Pro friendly file format keeping the original quality. Besides FCP, this software can also export DNxHD for Avid, MPEG-2 for Premiere Pro, Apple InterMediate Codec for iMovie and more NLE systems for native editing.

The trail-before-purchase is supported, just feel free to try it:


Step 1. Install and launch the Nikon video converter Mac and load source Nikon D750 clips to it.


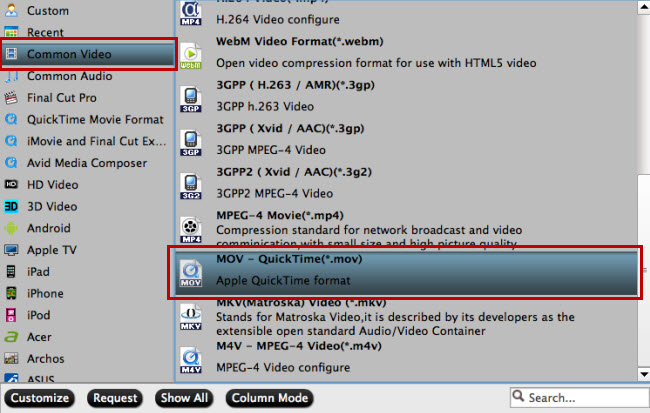
Step 2. Click "Format" pull down list to select Final Cut Pro > Apple ProRes 422 (*.mov) as the best video format for FCP (FCP X, FCP 7, FCP 6). QuickTime MOV format is the good choice as well.


Step 3. In case the default settings do not fit your requirement, you can click "Settings" button and enter "Profile Settings" panel to adjust video size, bit rate, frame rate, sample rate and audio channels.


Step 4. Click "Convert" button to start encoding Nikon D750 H.264 MOV video to ProRes MOV for importing to FCP X, FCP 7 and FCP 6. 

When the conversion task is finished, click "Open" button to get the exported files and then import the converted D750 footage into FCP to do further editing.

Read More:

Monday, January 25, 2016

Best Camera 2016: Edit FUJIFILM X-T10 (11/18) Video Files in FCP X

The Fujifilm XT10 inherits the movie capabilities of the XT1 running its latest firmware update. As such you can film 1080p or 720p at 24, 25, 30, 50 or 60fps. There’s no 4k video though.

Sometimes, you may want to edit Fujifilm XT10 video in FCP X on Mac before sharing with others. But you may encounter some problems when you want to import Fujifilm X-T1 videos to FCP X for editing, like interrupt stop when importing, and couldn’t edit videos smoothly.

So how to import and load video clips from Fujifilm X-T10 to FCP X for smoothly editing on Mac? The best method is to transcode Fujifilm X-T10 footage to FCP X native format, for instance, Apple ProRes codec. The following passage guides you how to convert Fujifilm X-T10 video files to Apple ProRes file for FCP X.

Pavtube Video Converter for Mac (read the review)is high recommended for you to handle with Fujifilm X-T10 to FCP X issue. It supports not only encoding all Fujifilm video files to Apple ProRes so that you can easily import them to FCP X for smoothly editing, but also supports transcoding all Fujifilm footage to Apple ProRes for Final Cut Pro 6/7 editing. This will help you import the file correctly and saving the rendering time. 

In fact, it support nearly all HD/SD video and audio formats to various video and audio format; Make videos & movies & audios compatible with Android tablets/Phones, Apple devices, video game console, websites and more; Edit videos with trim, crop, split, merge and special effects; Process videos and movies in batch even faster and easier;


How to convert Fujifilm XT10 video to Apple ProRes for FCP X?

Step 1. From "File"drop-down option, select "add Video/Audio"to add source Fujifilm XT10 video files to the program.


Step 2. Click "Format"bar, from its drop-down list, select "Final Cut Pro"> "Apple Prores 422(*.mov)"as your desired output file format.


Step 3. Go back to the main interface and press the "Convert"icon on the right-bottom to start Fujifilm XT10 video to Final Cut Pro Apple Prores process.

When the conversion is done, you can easily import the converted video to FCP X for furthering professional editing.

Read More:

Thursday, January 21, 2016

Best Camera 2016: Edit Panasonic Lumix LX100(3/18) AVCHD Files in FCP X

“Someone shot some 60p AVCHD video for us in high definition using a Panasonic Lumix DMC-LX100 camera and I needed to convert those AVCHD file in order to use it for editing on Mac FCP X. I tried several converters, but couldn’t find one that could do what I wanted with good quality. Some of them produced files with terrible image, and others converted the audio a few frames behind the video no matter what settings I tried. So my question is, is there a very easy to use Lumix DMC-LX100 AVCHD Converter for Mac that could work perfectly for me (convert seamlessly)? Any recommendations? Thanks a lot.”

I heard someone always complains about the trouble of working Panasonic Lumix DMC-LX100 AVCHD MTS files with FCP X, actually, for directly importing to FCP X is not a good method. 

Regarding to the AVCHD codec, it is very popular in both the professional and consumer market. That means most non-linear editing software should have full support for the codec, but the thing is that users still have problems one or another while trying to open the Panasonic DMC-LX100 AVCHD footage in Final Cut Pro for further editing. 

In order to import and edit Panasonic DMC-LX100 AVCHD files in FCP X without crashing problem and avoid rendering, you’d better transcode the Panasonic DMC-LX100 AVCHD footages to FCP X native format. Pavtube Video Converter for Mac(read the review)is a professional AVCHD Converter, which can help you to convert Panasonic DMC-LX100 AVCHD to Apple ProRes for Final Cut Pro X.

Hot SearchAVCHD on VLC Player | AVCHD to iMovie/FCE/FCP | AVCHD Player


How to Convert Panasonic Lumix LX100(3/18) AVCHD Files to ProRes for FCP X

1.Add files > Run the program you just set up. Drag and drop the Panasonic Lumix DMC-LX100 4K/AVCHD video files to the converter. You can also hit Add files button to import videos to the app. If you wanna combine several videos into one file, you can click the "Merge into one" box. 


2.Choose output format > To transcode Panasonic LX100 60p AVCHD files for FCP X, select ‘Apple ProRes 422 (*.mov)’ as output format under ‘Final Cut Pro’ column. The ProRes codec is also workable in its former version FCP 6 and FCP 7.


3.Custom video and audio settings (optional) > If necessary, you can click ‘Settings’ button and go to ‘Profiles Settings’ panel to modify video and audio settings like video encoder, resolution, video bit rate, frame rate, aspect ratio, audio encoder, sample rate, audio bit rate, and audio channels. 3D settings are also available.


4. Begin Panasonic LX100 video Conversion on Mac > When ready, click ‘Convert’ to start format conversion. Once the conversion process is complete, you can click ‘Open Folder’ button to get the generated ProRes MOV files for editing in FCP X with optimum performance.

Tips:
If you don’t want to wait for the entire conversion process, you can tick off ‘Showdown computer when conversion completed’ and go away to do other things.

Read More:

Tuesday, January 19, 2016

Best Camera 2016: Edit Panasonic Lumix LX100(4/18) MP4 Files in FCP X

The black Panasonic LUMIX DMC-LX100 Digital Camera is an advanced point-and-shoot with manual controls designed to enable and inspire creativity. It features a large multi-aspect 16.8MP 4/3″ MOS sensor to produce 12.8MP still images (4:3) and 4K Ultra HD video at 30 and 24 fps. You also have the ability to extract high-resolution 8MP images from the 4K video, letting you capture entire scenes without missing a shot.

Take advantage of 4K Ultra HD 3840 x 2160 video recording at 30 or 24 fps in MP4 format. 4K video can be recorded for up to 15 minutes, and requires an SD card rated at UHS-I Speed Class 3. The camera also records Full HD 1080p video at 60 or 30 fps in MP4 or AVCHD formats.

As you see, the Panasonic DMC-LX100 gains great respect for its 4K ability- it can record 4K videos in MP4. While, you will find it’s a painful experience to import and edit Panasonic LX100 4K in FCP. Although FCP X supports 4K, while most editing programs including Final Cut Pro 6/7 still use 1080p as primary delivery format and will continue to do so for a long time.

In order to convert the 4K MP4/AVCHD taken with Panasonic LX100 to Apple ProRes codec, you’ll need Pavtube HD Video Converter for Mac(read the review), a professional high-definition video converter that converts Panasonic DMC-LX100 footage as well as HD videos of other various formats to editable and playable video and audio formats. You may download a trial of the software to try it out.


How to convert Panasonic DMC-LX100 4K MP4 into ProRes

Step 1. Launch the 4K/HD Video converter. Drag the 4K .mp4 files from Panasonic DMC-LX100 to the software. It supports batch conversion and joining multiple video clips into one file.


Step 2. Click the “Format” bar and select Final Cut Pro> Apple PreRes 422(*.mov) as output format.


Tips: If you want to know more about Apple ProRes, please check Types of Apple ProRes CodecsApple ProRes Info & Tips,Apple ProRes Specifications.

Step 3. You can click the “Settings” button and video size, bitrate and fame rate are flexible and can be adjusted as you like, 1080p would be the best settings. Of course, if you already owner a new Retina MacBook Pro, you keep the original video resolution.


Step 4. Hit the convert button to start transcoding Panasonic DMC-LX100 4K MP4 to ProRes for FCP X.

After the conversion, click Open to get the output videos. Now you can run the Final Cut Pro X and click File --> Import --> Files to import the converted 4K files and edit them in FCP X without any trouble.

Note: Before load files to FCP X, please make sure you have installed ProApps QuickTime Codecs, or you may get files with sound only without video.

Read More:

Thursday, January 14, 2016

Stream the Movies on your Desktop to your Kids Kindle Edition Fire

Have no idea about the Kids Kindle Edition Fire File Transfer? Here, you will find ways to get compatible or incompatible movies to Kids Kindle Edition Fire on Windows or Mac desktop.

Transfer Kids Kindle Edition Fire Compatible Movies

You can transfer movies from a Windows or Mac desktop to your Kids Kindle Edition Fire using the USB cable that came with your Kindle. Both Mac and Windows users can download and transfer compatible movies from a desktop to Kids Kindle Edition Fire using a compatible USB cable. When your Kids Kindle Edition Fire is plugged into your computer, it will appear as a removable mass-storage device. This method is highly recommended.

Step-by-step Instructions:

1. Connect Kids Kindle Edition Fire to your PC/MAC via USB.
2. Once you've connected your Kids Kindle Edition Fire to a computer with a USB cable (sold separately), your Kids Kindle Edition Fire will appear in the same location as external USB drives usually appear. For Windows users, this is typically in the "Computer" or "My Computer" menu.
3. Open the Kindle drive; you will see several folders inside. You may need to unlock your Kids Kindle Edition Fire before it can be opened on your computer.
4. Locate the movies and drag and drop it into the applicable content folder.
5. Safely eject your Kids Kindle Edition Fire from your computer and unplug the USB cable.


Tips: Movies will appear in the Gallery app. Note that videos transferred via USB will only be available in the Gallery app. Only movies from the Amazon Video store are shown in the Video library.

Transfer Kids Kindle Edition Fire Incompatible Movies

Amazon has listed the supported file formats clearly. Please check directly below:

Audio formats supported by Kindle Fire tablets: AAC, MP3, MIDI, OGG, WAV

Video formats supported by Kindle Fire tablets: MP4, VP8, 3GP, WebM, M4V, 3G2

Kindly note:

Please pay attention to the specific parameters like video resolution, bitrate, and frame rate for each supported format because the maximum video resolution is 1920*1080, and the maximum frame rate is 30. You can check onAmazon official site for more details.

Thus, if you want to copy movies to Kids Kindle Edition Fire in other formats like MKV, WMV, AVI, FLV, MTS, M2TS, MOV, MPEG, MPG, MOD, TiVo, VOB, etc, you will need reformat these video files first. You can try this professional Kindle Edition Fire Video Converter / Mac Version to batch convert videos in various formats up to 1080p to the Kids Kindle Edition Fire playable format (e.g. MP4). With it you can change the movie resolution in 1920*1080, frame rate at 30 as I mentioned Kids Kindle Edition Fire limitation above. Download the software and let’s start the conversion.


How to Convert Kids Kindle Edition Fire Incompatible Movies into MP4

First, download the Kindle Edition Fire video converter through the above link. Install and launch it on your computer. Then click “File”to add the incompatible movies to the program.


Second, Follow “Android” > “Amazon Kindle Fire HD (*.mp4)” in the format list.


Third, Change the movie resolution in 1920*1080, frame rate at 30.

Final, one click “Convert” to start conversion for Kids Kindle Edition Fire. The converting duration depends on the size of the file you want to convert.

When the conversion is finished, you can stream the converted incompatible movies to Kids Kindle Edition Fire via USB which I have introduced.

Related program: If you have the intention to transfer Blu-ray, DVD movies as well as your personal HD video files to Kindle Fire HD, you'd better get the best all-in-one video convert tool Blu-ray Video Converter to have fastest and most effective conversion.

Read More:

Tuesday, January 12, 2016

Few Clicks to Watch Windows Home Server Videos on Xbox One

If you got yourself a new Windows Home Server and you just got the xBox, did you know you can connect these two together? Yup, Xbox One and your Windows Home Server are compatible devices that can work together. And today I’ll show you connect your Xbox One to your Home Server, and play the video on your Home Server on Xbox One. 


That is,the setup is quite easy and it takes only a few minutes. When you’re done, your Xbox One will be able to do these awesome things:
  • create a photo slide show with pictures that are on your Home Server
  • play music that is located on your Home Server — even from your iTunes
  • watch videos that you have saved on your Home Server
  • Basically your Xbox One one will become a multimedia extension of your Home Server. You can stream music, photos and videos from your Home Server to your Xbox One and you don’t even need any additional software.
So if you think that watching your family vacation videos on the big screen sounds like fun, or rocking out to your favorite iTunes without leaving your couch is something you’d like to do — then follow these easy steps and do what you’re supposed to do with your Home Server — connect! Now let’s get to it!
  1. First, open the Windows Home Server Console and set up Media Library Sharing. Click Settings then Media Sharing. Select the media types (Music, Photos and Videos) you want to share. Click OK.
  2. Next, power on your Xbox one and verify it’s connected to your network. Wireless or Ethernet will work, but for best performance I recommend you plug in the Ethernet cable.
  3. From the main menu, select My Video Apps.Then scroll over and select Video Player.
  4. A list of the computers on your network will be listed. Select your WHS.
  5. Next you’ll be able to browse the media library folders you shared from the server.
  6. Then drill down to the video you want to watch.
  7. Enjoy the show from WHS through the Xbox one. You can use your Xbox controller remote to control playback.
It will be a great visual feast to watch videos on Xbox One. In consideration that you might run into Xbox One formats incompatibility issues while watching videos, the next guide focuses on the best audio and video format for Xbox One so that you can have a hassle-free video enjoyment on Xbox One with WHS.

The Xbox One support multiple video formats like these:

File extensionsContainersVideo profilesVideo bit rate
AVI support.avi, .divxAVIMPEG-4 Part 2 (Simple Profile and Advanced Simple Profile)5 Mbps with resolutions of 1280 × 720 at 30 fps
H.264 support.mp4, .m4v, mp4v, .mov, .aviMPEG-4, QuickTimeBaseline, main and high (up to level 4.1)10 Mbps with resolutions of 1920 × 1080 at 30 fps
MPEG-4 Part 2 support.mp4, .m4v, .mp4v, .mov, .aviMPEG-4, QuickTimeMPEG-4 Part 2 (Simple Profile and Advanced Simple Profile)5 Mbps with resolutions of 1280 × 720 at 30 fps
WMV (VC-1) support.wmvASFWMV7 (WMV1), WMV8 (WMV2), WMV9 (WMV3), VC-1 (WVC1 or WMVA) in simple, main and advanced up to level 3Video bit rate: 15 Mbps with resolutions of 1920 × 1080 at 30 fps

Sometimes, movies and videos are unplayable on Xbox One, partly due to the files saved in the file extension like Tivo, MTS, FLV, VOB, MKV etc are out of Xbox One supported video and audio format list. The answer to this issue is to find the best codec for video playback.

Here the video codec transcoding professor Pavtube Video Converter / Mac Version(read the review) will be your best aid for video to Xbox One conversion. Not only it can convert any unsupported video to Xbox One supported video formats like MP4, AVI, WMV, as well as the audio file format supported by Xbox One like MP3, but also you can save yourself a lot of time with the preset profiles for each version of Xbox One gadgets, making it stand out from the crowd similar software.

Hot SearchBlu-ray/DVD to Home Server | Blu-ray DVD to Xbox 360 | 4k to Xbox One

Download Pavtube Video Converter for Watching Windows Home Server Videos on Xbox One Smoothly:


Few Clicks to Watch Any Videos on Xbox One via Windows Home Server

Step 1. Import source files.

Run Pavtube Video Converter, and import source files to it by click of clicking “Add video” button.


Step 2. Pick Xbox One supported file format

Check Xbox One supported file formats and choose a proper one as output from the format profile by clicking the format bar.


Step 3. Hit the “Convert” button to start conversion for Xbox One . 

When the conversion is finished, you can stream the converted video to your Windows Home Server and watch them on your Xbox One follow the step introduced above.

Read More:

Thursday, January 7, 2016

Fast Way to Convert M4V to AVI on Mac OS X or Windows 10

Hi i just got a new dvd player that plays divx files via USB, but it only plays avi files and i have a ton of movies. Is there a free way on a mac to convert m4v to avi. I tried Handbrake (crash), Video Monkey, Video Drive, Quicktime, and changing the file extension all to no avail. anybody know how to do this, or any methods that i have tried but maybe something i missed.
Thanks for the help


M4V is the common but non-standard use of the MPEG-4 file extensions. It is due to the popularity of Apple’s iPod and the iTunes Store. For iTunes purchased or rented M4V files, it's recommended to use Pavtube Video Converter /Mac Version(read the review]) to convert M4V to unprotected formats like AVI, MP4, MOV, WMV, etc. Pavtube Video Converter is a powerful iTunes Video Conversion software designed for iTunes M4V media files. With Pavtube Video Converter, you can also edit iTunes videos and extract audio from iTunes video.

What's more, it has many interesting video editing functions: clip, crop, merge, split, watermark, and add soundtrack, which will enhance your conversion enjoyment.

Hot SearchM4V to iMovie | M4V Videos to YouTube/Vimeo | M4V Videos on Panasonic TV


This article will show you how to use Pavtube Video Converter to convert M4V to AVI easily.

Step 1. Import Tivo files 

After entering the Media Access Key, click “File” > “Load Video/Audio” or “Load from Folder” to navigate to the folder where you save the M4V files. 


Step 2. Choose AVI as output 

To set AVI as output, just go to the output format list and follow “HD Video” > “AVI HD Video (*.avi).” 


Step 3. Convert Tivo to AVI 

After choosing AVI as output, just hit the “Convert” button to start Tivo to AVI conversion on PC.

Read More:

Tuesday, January 5, 2016

Ideal Solution to Convert MKV to MOV to Play MKV on QuickTime on Mac?

Summary: Currently, dozens of Mac users are obsessed with using QuickTime to play video files downloaded from the website or bought from iTunes to QuickTime. This article here for you to smoothly play MKV on QuickTime on Mac.

"I have been looking for a while and I'm still at a loss of the best way to convert an HD movie in MKV format to MOV for playback on my Mac. I have tried HandBrake, but it seems to crash halfway through all the files I've tested so far. Also, if at all possible, I'm looking for something that will be able to convert my MKV files to MOV so that I can be watching them on QuickTime with El Capitan."

Consequently, provided that you are apt to play MKV on QuickTime on Mac (El Capitan) without any efforts, all you need is to convert MKV to QuickTime acceptable formats like MP4 and MOV. But in a wink, you will be haunted by the ensuing problem that is how to convert MKV to QuickTime on Mac easily. Take it easy, here recommends you a professional yet feature-rich MKV to QuickTime converter for Mac-Pavtube Video Converter for Mac to easily convert MKV to QuickTime MP4, MOV, etc. with zero quality loss.

Hot SearchYouTube to MOV | H.265 to QuickTime MOV | AVCHD/MTS/M2TS/M2T/TS to QuickTime MOV

Key Features of Pavtube Video Converter.
  • Convert almost all HD/SD audio/video formats: All types of audios and videos (e.g. SD/HD/Tivo/DRV/Camcorder HD/AVCHD footages, etc) to almost any audio and video formats.
  • hange default settings: You can change the parameters such as video size, bitrate, frame rate, and channels for your video file according to your need to get the best output effect.
  • Batch conversion: Handle multiple videos and realize batch conversion to save your time and energy.
  • Merging & splitting: Merge several video clips into one bigger file and splitting one video file into several clips according to the clip quantity, duration time and file size.
  • Create new output format: Adjust profile parameters, rename and save it for future use.
  • Supported OS: Mac OS X 10.11 El Capitan, Mac OS X 10.10 Yosemite, 10.9 Mavericks, 10.8 Mountain Lion, 10.7 Lion, 10.6 Snow Leopard, 10.5 Leopard
         

How to Convert MKV to QuickTime MOV on Mac El Capitan

First free download and install Pavtube Video Converter on your Mac, and then launch it. Now just follow the step by step guide to make editing work more smoothly.

Step 1: Run it and click “File” > “Add Video/Audio” or “Add from Folder” to import files. You can also directly drag and drop the files.


Step 2: As MOV is natively supported by QuickTime player on Mac, just go to the format list by clicking the format bar and choose “Common Video” and pick “MOV - QuickTime (*.mov).”


Step 3: Specify output folder on your computer to save the output files. Click the "Browse" button to choose the path where you want to save the output files in. 

Click the "Convert" button at the lower right corner of the interface to begin to convert MKV to MOV. 

After the conversion is finished, you can transfer the video to your desired output devices or editor for enjoyment.

Read More: