Monday, January 23, 2017

YouTube Videos to AAC YouTube Converter

YouTube is now one of the most popular video-hosting services on the Internet, with visitor around the world watching over 6 billion hours of user-generated video every month. Downloading a YouTube video to your local hard drive is actually pretty easy once you know how, but what if you want to get sound out of the YouTube videos and save in .aac audio file in Mac or PC machine? Want an all-in-one YouTube to AAC Download and YouTube to AAC Converter that can download and convert YouTube videos and audios to AAC? If these are your aims, this is definitely the right place for you. The following passage is going to give an explanation about why converting YouTube to AAC and tell a step by step guide on how to convert YouTube to AAC with a powerful YouTube to AAC Converter. 

Why Need to Convert YouTube to AAC on (Mac )? 

AAC is a type of file standard for lossy digital audio compression. It is defined by the MPEG-2 standard and designed to be the successor of the most known audio format - MP3, and AAC generally produces higher-quality sound than MP3 at similar bit rates (128 kbps, 192 kbps, and 256 kbps, etc.). AAC is the default encoding used by YouTube, Apple iTunes, iOS players, DivX Plus Web Player, PS3 and others. 

Best YouTube to AAC converter for Windows/Mac 

Thanks to a vast array of applications, the conversion of YouTube to AAC (MPEG-4 audio) file is not only possible, but simple. Today I'll be showing you how to use the hot Pavtube Video Converter Ultimate (Mac ) to extract audio from YouTube to AAC format for both Mac and Windows, which is capable of converting a wide variety of media formats with excellent output quality to any audios like AAC, FLAC, MP3 etc from YouTube. With it, you can also convert YouTube to various audios, videos and some popular devices like PS3, PS4, Wii, PSP, Xbox Game Consoles, Galaxy S7/S7 Edge, iPhone SE, iPhone 6s/6s Plus, iPad Pro,Apple TV


Other Download: 


- Pavtube old official address: http://www.pavtube.cn/blu-ray-video-converter-ultimate/ 
- Cnet Download: http://download.cnet.com/Pavtube-Video-Converter-Ultimate/3000-2194_4-75938564.html 
- Soft32 Download: http://pavtube-video-converter-ultimate.soft32.com/ 
- Top4download: http://www.top4download.com/pavtube-video-converter-ultimate/qxxwevxs.html 
- Softpedia Download:http://www.softpedia.com/get/Multimedia/Video/Encoders-Converter-DIVX-Related/Pavtube-Video-Converter-Ultimate.shtml 
- OKD Download: http://owlkingdownload.com/index.php?a=prog&os=Mac&cat=Audio-Video&subcat=Video&det=475 
- Windows7download:http://www.windows7download.com/win7-pavtube-video-converter-ultimate/talndtbf.html 
- Softonic Download:https://pavtube-video-converter-ultimate.en.softonic.com/ 
- 2software.net Download:http://2software.net/download-pavtube-video-converter-ultimate-free-download-and-software-reviews-4051 
- Gigapurbalingga Download: http://gigapurbalingga.com/pavtube-video-converter-ultimate-full/ 
- FullprogramDownload: https://www.fullprogramlarindir.com/pavtube-video-converter-ultimate-full-tam-indir.html 
- Daffasoft Download: http://daffasoft.com/1716/pavtube-video-converter-ultimate-4-8-4-full-crack 
- Eradownload: http://eradownload.com/pavtube-video-converter-ultimate-4-8-6-6-crack-free-download/ 
- Eurodownload: http://www.eurodownload.com/download-software/223704/Pavtube-Video-Converter-Ultimate.html 

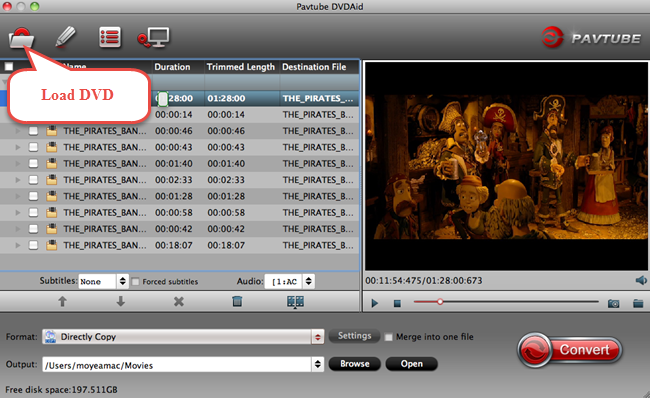
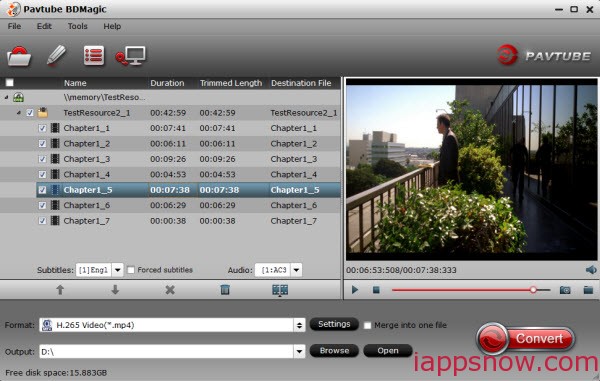
Step 1. Import YouTube Videos to AAC YouTube Converter 

Download videos from YouTube: If you need to download YouTube videos first, just click "Add Video" to load them to the program. 


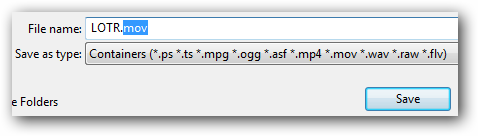
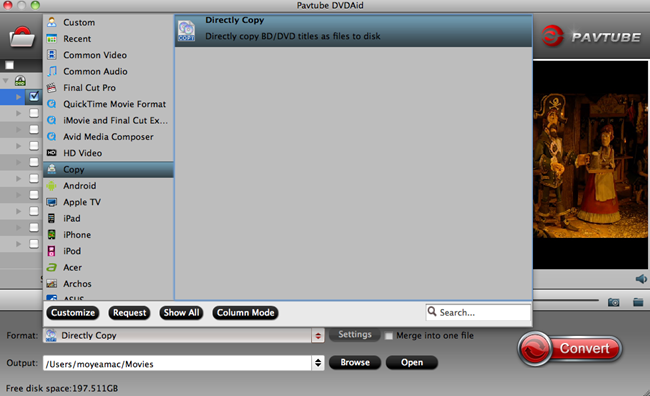
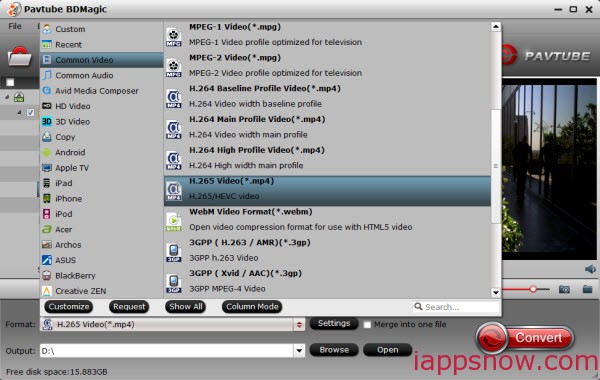
Step 2. Set AAC as the Desired Format 


To convert YouTube to AAC, choose AAC Advanced Audio Coding (*.aac) from "Common Audio" category from "Format" drop-down button. Here you can also select any audio formats like MP3 for more usages. 

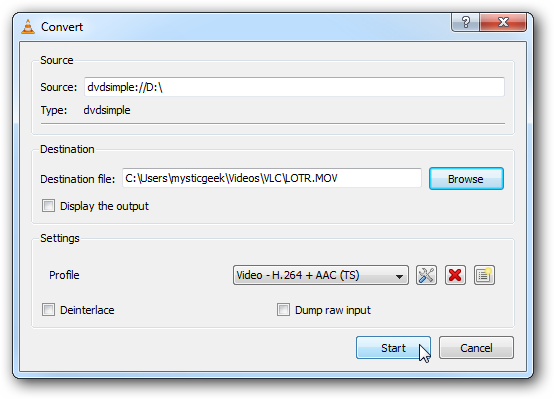
Step 3. Start Converting YouTube to AAC 

Click "start conversion" button to finish YouTube to AAC conversion. When the conversion finishes, click "Open" to find the converted video files. Then you can effortless transfer the video files to your devices for easy playback. It is just that easy to convert YouTube to AAC. Don't you want to try this YouTube to AAC Converter right now? 

More Topics:

Monday, January 16, 2017

Rip and copy DVD to VLC on Mac OS X

How to rip and copy DVD to VLC on Mac OS X is an everlasting and hot issue in all relevant digital copy, video conversion forums and bulletins. Backing up DVD to VLC means that you can enjoy your favorite DVD videos on computer conveniently and can protect your physical DVD disc from scratching. That’s why many people choose to transfer DVD to VLC on Mac OS X. Here, this article will show you two methods to play DVD on VLC: Method one, rip DVD with VLC on Mac OS X; Method two, copy DVD to VLC with VLC Alternative on Mac OS X.

Method one: How to rip DVD with VLC Media Player on Mac OS X El Capitan?

VLC is not just a media player. It allows you to rip your DVD as well. Here we will show you how to rip DVD movies with VLC. (Note : This tutorial is written for VLC 0.9.6 and up).
Step 1: Start up VLC on Mac and load up DVD video. Under “Media”, click on “Convert/Save”
Step 2: When Open Media window appears, click DVD tab and browse the Disc device to make sure the field is pointing to the optical drive. Then navigate to “Convert/Save’

Step 3: Next the Convert screen opens where you can select a location for the ripped file.


Step 4: Give the file a name and a supported extension. For this example we ripped Lord of the Rings and gave it a MOV extension. If you don’t label it with a supported file extension it will default to .ps (Program Stream) file.

Step 5: When all settings are done, the Convert screen will look something like this where we have the source drive and destination file with appropriate extension.

Finally, You should be able to play the converted file with other media players assuming you have the right codec.

Using VLC to rip DVD on Mac OS X takes too much time. And you will notice the converted movie in lower quality compared to the original. Also, VLC does not support the DVD with internal encryption so that it can’t recognize protected DVD well and fail to extract movies from DVD successfully. In this case, you have to turn your eyes to VLC Alternative to solve the problem.

Method two: How to copy DVD to VLC with VLC Alternative on Mac OS X El Capitan?

Pavtube DVDAid for Mac is recommended as VLC Altenative, which can 1:1 backup DVD protected without lossless quality. It enables you to rip DVD to VLC on Mac OS X El Capitan in H.265, M3U8,VOB, MP4, MKV, MOV, AVI, DivX, etc, at fast speed. Not like VLC, it continuously upgrades with new decryption technology for new released DVD. And it can support the newest Mac OS X system, like El Capitan, Yosemite 10.10/10.9.

Free Download and Install DVD Ripper for Mac OS X El Capitan


How to rip DVD to VOB for VLC on Mac OS X El Capitan


Step 1. Import DVD to the app

Run Pavtube DVDAid on your Mac, and load your DVD disc by clicking the “File” icon and this process only takes you a few seconds.

Step 2. Copy DVD main movie

Click the format bar to follow “Copy” and “Directly copy”. Directly copy allows you to copy the main movie from your DVD disc without extras. If you want your converted DVD supported by more devices, take a try with other popular video formats suitable for your device. Please kindly note that Pavtube trial version only supports 6-time directly copy.
dvdaid for mac vob format

Step 3.Start DVD to VOB conversion

Click the red button “Convert” on the main interface to start conversion from DVD to VLC on Mac OS X El Capitan. It will pop up a conversion window indicating the conversion progress from DVD to VOB.

Both of the two method can achieve the process of DVD to VLC on Mac OS X El Capitan. Nevertheless, the latter method obviously is easier than the former one. and it has much faster DVD ripping speed than DVD ripping with VLC. What’s the most important, ripping DVD to VLC on Mac OS X El Capitan with VLC Alternative can reserve the original video quality. Now, you can smoothly enjoy DVD on VLC.
In addition: With Pavtube ByteCopy for Mac, you can backup DVD to multi-track MKV for VLC on Mac OS X El Capitan with subtitles and audio tracks well preserved.

Friday, January 13, 2017

Ripping Blu-ray to H.265/HEVC MP4 on PC

HEVC/H.265, the successor to AVC/H.264, more than triples the existing AVC intra-frame prediction modes to achieve significant bitrate savings, It is targeted to next-generation HDTV displays and content capture systems that feature progressive scanned frames and display resolutions from QVGA (320×240) up to 1080p and Ultra HDTV 4320p (7680×4320.) It is a codec that can offer up to 50% reduced bitrate at the same quality when compared to AVC/H.264. 


In this article, I will show how you can convert your Blu-ray to H.265/HEVC MP4 on PC to greatly reduce the output size in a simple and fast way. 

Then how can we do to compress the size of Blu-ray files so that we can bring them with our H.265/HEVC players for watching? Here Pavtube BDMagic is quite intuitive. Even though you have no experience on Blu-ray ripping, you can know the each next step according to the instructions on the main interface. You can rip Blu-ray and DVD to H.265/HEVC MP4 and MKV up to 30x times speed using Nvidia GPU hardware acceleration and convert Blu-ray and DVD to H.264 MP4, MKV, AVI, WMV, FLV, TS, MOV, M4V, etc by up to 500% speed with NVIDIA CUDA acceleration than the same action with no acceleration. 
Main features:
  • Powerful Blu-ray/DVD Ripper: Converts Blu-ray/DVD and ISO/IFO files to H.265 video filess rapidly in high quality.
  • Wide Selection of Formats Supported: Converts any video files to various video and audio formats and popular media players
  • Fast-Speed Blu-ray/DVD Converter: If your computer have Nvidia CUDA/ATI AMD ready graphics card, you can have GPU encoding and the conversion would be faster. Note this function only works when you choose H.264 Baseline Profile.
  • Lossless Conversion: Converts Blu-ray, DVD video files without the risk of losing its original quality.
  • Additional Features: Edit tool videos, can create 3D video, 1:1 disc backup, copy main BD/DVD movie and etc.
Guide: Rip and compress Blu-ray to H.265/HEVC MP4 on PC with best quality 

Step 1: Import Blu-ray movies to the best Blu-ray to H.265 Ripper 

Load your disc to the Blu-ray drive room, and launch the Blu-ray to H.265 Ripper; click the disc button to import your Blu-ray movies to the program. 


Tip: 

Click the main file of your Blu-ray to select the subtitles for Blu-ray movies in the “Subtitles” option. 

Step 2. Choose the suitable output format 

From format bar, just choose “Common Video >> H.265 Video(*.mp4)” as your output format. Or select “HD Video >> H.265 HD Video(*.mp4)” to get HD quality. 

To get H.264 video for output, just go to the ‘Common Video’ to select the ‘H.264 Baseline/Main/High profile (*.mp4)’ as your favorite. Or in the ‘HD Video’ item, ‘H.264 HD Video (*.mp4)’ is also available. 

You can also choose the preset output format for spacial devices such as iPad, Apple TV.etc 


Tip: 

Before conversion, you can go to the “Settings” to set the parameters for your movie. To compress the file size, adjust the parameters to be smaller. 

PS: Some quality will be lost if you compress them to be much smaller. So Pls ensure the movie quality before adjust the parameters. 

Step 3. Rip BD to H.265/HEVC MP4 

Click the Convert button on the main interface to start compressing Blu-ray. Once the conversion finished, you can get the ripped video as you wanted by clicking “Open” button. Sharing your movies with families and friends on TV or H.265 media players is easy for you! 

Wanna do H.265 conversion? You can get this upgraded ultimate converter to decode H.265 video or encode your videos to H.265 MP4 for playback. 

Monday, January 9, 2017

Play Downloaded YouTube videos on Windows Media Player

Many YouTube fans would like to download and play YouTube on Windows Media Player offline, especially for Windows users. However, you cannot simply play downloaded YouTube ton Windows Media Player sometimes. For YouTube videos are in FLV, but Windows Media Player can't play FLV videos.

To solve this, you need a good YouTube to Windows Media Player converter so that to convert and import YouTube to Windows Media Player. Any video converter to convert YouTube FLV video to Windows Media Player supported WMV for Windows?

Get Best YouTube to Windows Media Player Video Converter

Pavtube Video Converter is a type of professional, quickly, safe and easy-to-use video conversion application which is specialized in converting YouTube FLV to WMV for playing on Windows Media Player or further edition in Window Movie Maker. The software package supports convert, edit various popular video and audio formats.

Hyper-threading technology supported, this FLV to WMV converter helps you converting FLV video to WMV with 30x fast speed. Furthermore, it enables you to convert two or more YouTube FLV videos at a time. What’s more, it is 100% No Spyware, No Malware, No Adware and No Viruses.

Hot search:

MP4 to Windows Media Player AVI to Windows Media Player
MTS to Windows Media Player FLV to Windows Media Player

Key Features:


-It quickly converts FLV to WMV, include SD, HD WMV and AVI.
-It quickly compresses 4K FLV to 1080p or 720p WMV.
-It quickly create 3D WMV from FLV video.
-It quickly edit AVI and WMV videos.
-It quickly extract audio from FLV and WMV videos.
-It quickly convert videos to any different format such as AVI, WMV, MOV, MKV, MP4, M2TS, VOB, Tivo, M4V, SWF, FLV, F4V, WRF and much more. It also supports HD/4K video files like 4K/HD MP4/MKV/AVI/MOV/M2TS, etc., as well as 3D MP4, 3D AVI, 3D MKV, 3D WMV, 3D Youtube.
-It can also convert a number of standard of audio files to formats like FLAC, AC3, MP3, AAC, WMA, WAV, MKA, OGG, etc.
-It also has an editor with basic editing tools like cropping, splitting and rotating. And you can also add watermarks to images and videos.
-It can be compatible with Windows 10/8/7/XP/Vista, macOS Seirra 10.12 or older.

Free Download Pavtube Video Converter and get it installed on your computer:

Other Download:
- Pavtube old official address: http://www.pavtube.com/video_converter/
- Cnet Download: http://download.cnet.com/Pavtube-Video-Converter/3000-2194_4-75734821.html
- Softonic Download: http://pavtube-video-converter.en.softonic.com/

Note: It is very important that you should make sure that each and every step is followed without any skipping to get the state of the art results without any issue:

User guide to Convert YouTube video to Windows Media Player supported playing-format

Step 1. Installed and run the program to begin the process. Then click the “Add files” button to add the desired YouTube video easily:

Step 2. Select output format for Windows Media Player.

Click “Format” menu you will find various video formats listed by different devices. Just choose a compatible video format for Windows Media Player. You can choose “Common Video” > “WMV 2 (WMV8)(*.wmv)” as the output format, or select “HD Video” and choose “WMV HD(*.wmv)” as the output format.

Step 3. In the last step you should make sure that the “Convert” button is pressed and the user gets the file converted and this also marks the end of the process in full.

This 3 step process is the easiest way to overcome the Windows Media Player can’t read YouTube FLV files issue.

Related Posts:


Tuesday, January 3, 2017

2 Easy Ways to Play all AVI on Windows Media Player 12

"I am not able to play AVI video files in WMP (Windows Media Player) 12. It says these files are not supported by WMP. Can you suggest a remedy."

We found many users and our client have the difficulties playing AVI video on Windows Media Player 12. Don’t worry, now we share you why sometimes Windows Media Player 12 doesn’t support AVI and best solution for better playing AVI on Windows Media Player 12.

AVI Codec Pack not installed
AVI is a very old container format, the video stream could be compressed using the DivX, Xvid, H.264, VP9 or MPEG-4 codec. If your AVI file contains a video stream that uses a more modern codec for compression, Windows Media Player 12 may not be able to play it because it can’t decompress that particular codec. So you need install the appropriate codecs on your computer.
Corrupted or damaged AVI files
If the right AVI codec pack have been installed, but Windows media player 12 can’t still play the AVI files, your AVI files may be corrupted. In this case, you can play the corrupted or damaged AVI files on other players or devices to check if this is the reason.
AVI Format not converted properly
If you use sub-standard conversion method, you’re still faced with AVI files can not be played on Windows Media Player 12. It is recommended to ensure the best and most advanced conversion method applied to ensure that users get the best results.

Solution 1. Install AVI codecs for Windows Media Player

You can install the missing codec that Windows Media Player needs to play AVI files. Here is AVI codecs website:

You just needs to visit the URL, click the download link to start the downloading of the codecs and the related file is to be saved. Then run the downloaded file and the prompts are followed in this regard to install the program. Once done a system restart is required. Then you can play AVI files on Windows Media Player with smoothness.

Solution 2. Convert unsupported AVI files to Windows Media Player 12 friendly format

In order to convert your AVI to Windows Media Player 12 supported format quickly and easily, it's time for you to try out the professional yet easy-to-use Video Converter - Pavtube Video Converter. It features a simple yet sleek interface and performs files conversion up to 30X faster enables you to complete the task in just a few clicks at your fingertips.

Hot features of Pavtube Video Converter

  • Wide range of formats - works with over 250 audio and video formats including H.265.
  • High Quality conversion - It does not lose quality when it converts video.
  • Quick conversion - Brings about conversion at seed of up to 30X.
  • Custom Video - Personalize videos with diversified video editing tools.
  • Allow you to complete the conversion process with three simple clicks.
  • Compatible with Windows 10, Windows 8.1, Windows 8, Windows 7, Windows XP.

Using Pavtube Video Converter you can also convert various video to Windows Media Player supported formats:

MP4 to Windows Media Player ǀ MPG to Windows Media Player ǀ MKV to Windows Media Player

Other Download:
- Pavtube old official address: http://www.pavtube.com/video_converter/
- Cnet Download: http://download.cnet.com/Pavtube-Video-Converter/3000-2194_4-75734821.html
- Softonic Download: http://pavtube-video-converter.en.softonic.com/

User guide to Change AVI to suitable format for Windows Media Player 12

Step 1. Load your AVI files

Install and run this Video Converter, drag-and-drop AVI file to the program window, or go to the menu bar and choose Convert > Add Files Files to locate your AVI file. Note: this smart converter allows batch conversion to save your time, you can add as many AVI files as you want onto it.

Step 2. Choose Windows Media Player 12 format

Click the “Format” bar to get the drop-down menu and you can get “Common Video -> WMV3 (WMV9) (*.wmv)”or "HD Video" > "HD WMV" as the best output format for playing in Windows Media Player 12.

PLAY AVI ON WINDOWS

Tips:

You can click on the Settings button to set additional parameters for both the audio and video; including resolution, frame rate, encoder, bitrates and etc. Before converting, you can preview your videos real-time in the preview pane as well as personalize your video by trimming, cropping, watermarking and adding some other effects.

Step 3. Begin AVI to Windows Media Player 12 conversion

Hit “Convert” and let this smart AVI to Windows Media Player Video Converter do the rest for you! Have a nice day!

Read More:

Source: http://mediaconverting.blogspot.com/2017/01/windows-media-player-12-avi-solution.html