Do you have a video on your iPad that you want to show off to everyone in the house? Do you wish you could watch Netflix on the big screen instead of squinting at your iPad? With the right software and hardware, streaming video from your iPad to your TV is a snap. See Step 1 below to learn how.
Method 1. AirPlay
1.Check that your hardware is compatible. In order to use AirPlay, you will need an iPad 2 or newer. The original iPad will not work with AirPlay. You will also need a second generation or newer Apple TV box.
The iPad 2 released in 2011. Original iPads have the model number A1219 or A1337.
The second generation Apple TV released late 2010.
Both devices must be upgraded to the latest version of iOS. This will ensure that you get the best quality picture.
2.Turn on your TV and the Apple TV box. Your TV should be turned to the input that the Apple TV is connected to. You will see the Apple TV interface if everything is hooked up correctly.
See this guide for detailed instructions on setting up your Apple TV for the first time.
Check the AirPlay section of the settings menu to ensure that AirPlay is enabled.
3.Connect your iPad to your network. In order to use AirPlay, your iPad will need to be on the same network as your Apple TV. See this guide for details on connecting an iPad to a wireless network.
4.Start the video you want to stream. You can stream videos directly to your Apple TV by opening the video on your iPad and then tapping the AirPlay button. This button is located next to the "Next" button on the playback controls.
You can control playback during streaming by using the playback buttons that appear on the iPad screen.
A variety of media apps allow AirPlay streaming as well, such as Netflix and Hulu+. Use the AirPlay button to send the signal to your Apple TV.
5.Stream your entire screen. If you'd rather stream everything displayed on your iPad screen instead of just specific videos, you can turn on screen sharing in the Control Center.
If you are using iOS 7, swipe up from the bottom of the Home Screen to open the Control Center, and then tap the AirPlay button and select your Apple TV from the menu.
If you are using iOS 6, double-tap the Home button and then swipe the bar at the bottom to the right. Tap the AirPlay button in the Control Center and select your Apple TV from the menu.
You can toggle Mirroring on and off from the Control Center as well. If Mirroring is on, the iPad and the TV will both show the same screen.
Method 2. Smart TV
1.Connect your Smart TV to your home network. In order to stream content from your iPad to your TV, your TV needs to have network-capabilities, and needs to be connected to your home network.
The process for connecting your TV to your network varies from TV to TV. Consult your TV's documentation or support page for instructions on connecting the TV to your home network.
2.Download a streaming app. In order to send data to the TV, you will need an app that allows you to connect to Smart TVs on your network. One of the most popular apps is iMediaShare.
The free version will allow you to stream pictures and videos that are on your iPad already. In order to use the additional streaming options you will need the paid version.
3.Open the app. After a moment, the content on your iPad will load. You will be able to select any image or video stored on your iPad.
4.Tap on a video. Selecting a video will pull up a menu of all the connected devices on your network. Choose your Smart TV from the list. If your TV is not listed, tap the "Others (Undetected)" option and follow the prompts to try to detect your TV.
5. Watch your video. After selecting your TV from the list of options, the video will begin playing on the TV screen. You can control playback from the app on the iPad.[3]
If you are experiencing poor performance, it may be because your TV is connected wirelessly. Try connecting your Smart TV via Ethernet instead of Wi-Fi, or place your iPad closer to your router.
Tips: Solve can’t play all iPad videos on TV
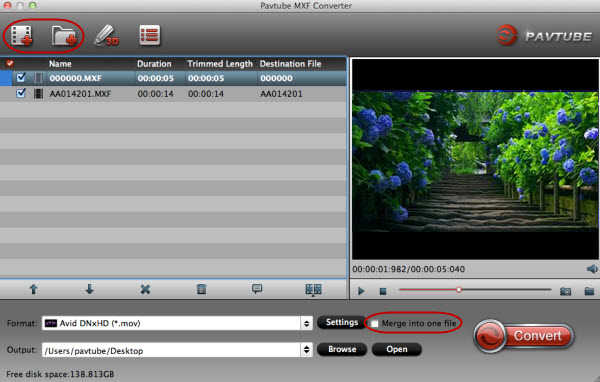
If your iPad videos are not played nicely on TV, you can convert your iPad video to TV friendly formats for ncie playing. Pavtube Video Converter is a professional TV video converter which can convert any videos from your iPad to TV including Samsung TV, LG TV, Sony TV etc supported format. It can convert 250+ formats like H.265, MKV, MP4, AVI, Tivo, MPEG, AVCHD, XAVC,MXF etc to any popular formats you need. Besides, in this program, professional editing functions are provided to you: split, merge, trim, crop, add watermark, adjust video effect, edit audio and insert subtitles. If you are a Mac user, you can get Pavtube Video Converter for Mac.
Free download the TV video converter for Windows:
Free download the TV video converter for Mac:
Read Guides:
This Blog mainly talks on how to get rid of problems of importing various kinds of camera footage such as Canon, Panasonic, Sony, JVC, etc to popular editing tools such as FCP, Avid, iMovie, etc for editing and some hot media players for playback. Just join us to know more!
Tuesday, September 27, 2016
Tuesday, September 20, 2016
Solution for Importing Lumix GX85/GX80 4K MP4/MTS to Premiere Pro CC
The Panasonic Lumix DMC-GX85 (known as the GX80 outside of North America) is Panasonic's latest mid-range Micro Four Thirds model. It sits in the company's 'GX' series which is used to denote that it's targeted towards dedicated enthusiast photographers but priced as a mid-range model.The GX85 continues Panasonic's history of offering high-end video capabilities across much of its range, with this latest camera able to shoot UHD 4K at 30p or 24p. It shoots this 4K footage as MP4s at up to 100Mbps, which is pretty respectable for a consumer-focused model. It can also capture 1080p footage at up to 28Mbps as MP4 or AVCHD. Well, in this page, I will talk about the Panasonic GX85/GX80 4K MP4/MTS to Premiere Pro CC workflow.
So, how to successfully import Panasonic Lumix GX85/GX80 4K MP4/1080P AVCHD recording to Premiere Pro CC? As we all know, Premiere Pro CC works best with clips in the H.264 MOV format, the easy workaround is, get a Mac Video Converter for Premiere Pro CC and convert Panasonic Lumix GX85/GX80 MTS and 4K MP4/MTS to Premiere Pro CC supported formats, which will save you both time and trouble, and all you need is to drag the Panasonic Lumix GX85/GX80 4K MTS and MP4 videos for prompt editing.
What you need is one professional Panasonic Lumix Video Converter - Pavtube HD Video Converter for Mac. With it, just in a few clicks you could successfully upload Lumix GX85 and Lumix GX80 4K MP4/MTS videos to Premiere Pro CC. Besides Premiere, it also can convert Lumix GX85/GX80 4K MP4/MTS recordings to other editing editors like FCP, iMovie, Avid Media Composer, DaVinci Resolve Lite (DaVinci Resolve) etc supported editing-formats. (read review)
Windows user get Pavtube Video Converter
Free download the 4K MP4/MTS to Premiere Pro CC Converter:
Other Download:
- Pavtube old official address: http://www.pavtube.com/video-converter-mac/
- Cnet Download: http://download.cnet.com/Pavtube-Video-Converter/3000-2194_4-76179460.html
- Top4download.com: http://www.top4download.com/pavtube-video-converter-for-mac/iujpttsg.html
Step-by-step Guide to Convert Lumix GX85/GX80 4K MP4/MTS to Premiere Pro CC supported formats
Step 1: You need to install and run the smart Video Converter Mac and transfer your AVCHD .mts or .mp4 recordings to the program. Join single video clips via checking the "Merge into one" box.
Step 2: Click on the "Format" bar and choose the best editable format.
To solve Panasonic GX85/GX80 4K and Adobe Premiere Pro CC incompatibility issues, please select Adobe Premiere/Sony Vegas > MPEG-2 (*.mpg) as the target format.
Tips: Adjust the video and audio parameters including the Bitrate of Video&Audio, Video Size, Sample Rate, Frame Rate, Audio Channels, etc., by clicking the Settings button for getting the best quality before starting conversion.
Step 3: As soon as all things are finished, please click "Convert" button to start the Panasonic Lumix GX85/GX80 4K AVCHD, MP4 video conversion on Mac OS X.
When the conversion is done, you can find the output files by clicking "Open" button on the main interface. Then you can import the converted Panasonic Lumix GX85/GX80 4K files to Premiere Pro CC for smooth playing and editing.
Read More:
- Best Canon EOS 5D Mark IV 4K to DaVinci Resolve Workflow
- Converting Canon 5D Mark IV 4K videos to FCP X for smooth editing
- Import Canon XC15 4K footages to Premiere Pro CC
- Tips for Importing and Editing Canon 5D Mark IV 4K MOV with Avid MC
- Canon 5D Mark IV 4K Video Recording, Review, Editing
- How to Convert and Import Sony HDR-PJ620 AVCHD to FCP X/7?
Thursday, September 8, 2016
Encode 4K S-Log to a more edit friendly codec on Mac/PC
S-Log is a gamma curve that is optimized under the assumption that grading will be performed in the post-production process. S-Gamut is color reproduction that is supposed to be used together with S-Log. If you want to edit the 4K S-Log with some popular editor like FCP, iMovie, Premiere Pro etc, you can learn how to transcode 4K S-Log to a more edit friendly codec on Mac/PC.
Currently, most major NLEs can handle 4K files without much problem, but it is extremely hardware intensive. What is a faster and more fluid 4K S-Log editing workflow on a Mac or Windows PC? Sometimes need to convert 4K S-Log footage to an edit friendly codec before importing them to NLEs. This requires a professional 4K S-Log file transcoder.
Pavtube 4K Video Converter for Mac is a professional 4K video converter, which can convert any 4K video including 4K MP4, 4K MOV, 4K XAVC, 4K XAVC S, 4K MXF, 4K MTS, 4K H.265 etc to FCP, iMovie, Premiere Pro, DaVinci Resolve, Sony Vegas Pro, Windows Movie Maker, Edius Pro, GoPro Studio more friendly edit codec/format for smooth editing. Or you can take this converter be a 4K video editor, because it also provide professional editing functions to you: split, merge, trim, crop, add watermark, adjust video effect, edit audio and insert subtitles.
Windows version: Pavtube Video Converter
How to Transcode 4K S-Log to a more edit friendly codec?
Step 1. Add videos
Install and run the 4K Converter for editor on your computer, then click "Add Video" button to browse and load your rvideos which you've transferred to your Mac.
Step 2. Click "Format" bar, and select your desire formats from "Common video" or "HD video" etc. You can also select the editable format from FCP, iMovie/FCE, Sony Vegas Pro/Premiere Pro, etc for your editing.
Reference:
Step 3. Click the "Convert" button on the main interface and the software will start to convert 4K S-Log to NLE friendly video formats immediately. When the conversion finishes, click "Open" to find the converted video files. Then you can effortless transfer the video files to NLE for nice editing.
Read Guides:
Currently, most major NLEs can handle 4K files without much problem, but it is extremely hardware intensive. What is a faster and more fluid 4K S-Log editing workflow on a Mac or Windows PC? Sometimes need to convert 4K S-Log footage to an edit friendly codec before importing them to NLEs. This requires a professional 4K S-Log file transcoder.
Pavtube 4K Video Converter for Mac is a professional 4K video converter, which can convert any 4K video including 4K MP4, 4K MOV, 4K XAVC, 4K XAVC S, 4K MXF, 4K MTS, 4K H.265 etc to FCP, iMovie, Premiere Pro, DaVinci Resolve, Sony Vegas Pro, Windows Movie Maker, Edius Pro, GoPro Studio more friendly edit codec/format for smooth editing. Or you can take this converter be a 4K video editor, because it also provide professional editing functions to you: split, merge, trim, crop, add watermark, adjust video effect, edit audio and insert subtitles.
*Top-trending 4K Converter - Pavtube HD Video Converter for Mac*
Convert/transcode 4K to NLEs best editable format on Mac
|
Windows version: Pavtube Video Converter
How to Transcode 4K S-Log to a more edit friendly codec?
Step 1. Add videos
Install and run the 4K Converter for editor on your computer, then click "Add Video" button to browse and load your rvideos which you've transferred to your Mac.
Step 2. Click "Format" bar, and select your desire formats from "Common video" or "HD video" etc. You can also select the editable format from FCP, iMovie/FCE, Sony Vegas Pro/Premiere Pro, etc for your editing.
Reference:
- FCP X supported formats
- iMovie/FCE supported formats
- Windows Movie Maker supported formats
- Avid MC supported formats
- GoPro Studio supported formats
Step 3. Click the "Convert" button on the main interface and the software will start to convert 4K S-Log to NLE friendly video formats immediately. When the conversion finishes, click "Open" to find the converted video files. Then you can effortless transfer the video files to NLE for nice editing.
Read Guides:
- How to Compress/Convert 4K Video for Editing with Windows Movie Maker?
- Can Final Cut Pro X Edit DJI Phantom 4K video?
- Import and Edit Sony A6300 4K XAVC S to Avid Media Composer
- How to Upscale 1080P to 4K on Mac or Windows?
- How to Mirror 4K Movies to TV with Chromecast 2
- Can 4K UHD Videos Be Played on iPad Pro?
- Easy Way to Get 4K H.265 playable onto the new Apple TV (ATV 4)
- How to play 4K Videos with Surface Pro 4 Windows 10 tablet?
Wednesday, August 31, 2016
Sync MXF to Pluraleyes 3.5/4 for smooth editing
If you’re trying to import MXF files into PluralEyes, you’ve probably realized this is easier said than done. In this tutorial, we’ll discuss how you can successfully import MXF files into PluralEyes. We’ll also compare how much easier this task can be when using Pavtube MXF Converter for Mac.
PluralEyes can synchronize a mixture of video and audio formats in a project. Footage from a wide variety of cameras and audio recording devices is supported. It is often helpful, but not required, for devices to have accurate time-of-day settings. Timecode recording is not necessary. If you attempt to add media file types that are incompatible, you will get a warning pop up at the top of the PluralEyes window. Take MXF as an example, though Pluraleyes support MXF, but you will still encounter some issues when importing MXF to Pluraleyes due to the MXF codec or other reasons.
So if you also have some problems importing and editing MXF with Pluraleyes 3.5/4, you can try converting MXF files to Pluraleyes supported formats and give it a whirl. Many users never had issues importing to PluralEyes and syncing with footages.
First you need to download Pavtube MXF Converter for Mac, an easy-to-use yet powerful high-quality MXF converter and editor (add subtitles to MXF, merge/split MXF etc) which is compatible with any Mac OS system. With this MXF to Pluraleyes converter, you can convert MXF (including Canon MXF) to Pluraleyes 3.5/4 friendly formats like MOV, WMV etc. Now I can use it to effortlessly transcode MXF to MOV/WMV for editing with PluralEyes. (read review)
PS: If you want to convert AVCHD MTS to Pluraleyes formats for editing, you can also try - Pavtube MTS/M2TS Converter.
Free download the MXF to Pluraleyes converter:
Other Download:
- Pavtube old official address: http://www.pavtube.com/mxf-converter-mac/
- AppStore Download: https://itunes.apple.com/us/app/pavtube-mxf-converter/id502807634?mt=12
- Cnet Download: http://download.cnet.com/Pavtube-MXF-Converter/3000-2194_4-76177789.html
Check out the video below for a step-by-step guide on how to import MXF video into PluralEyes
Step 1. Add MXF videos
Install and run the MXF to PluralEyes Converter on your computer, then click "Add Video" button to browse and load your rvideos.
Step 2. Click "Format" bar and choose a proper target format
a.If you are working with PulralEyes on Mac, you’re suggested selecting "Final Cut Pro >> Apple ProRes 422 (*.mov)" as output format for using MXF in PluralEyes with natively supported video codec.
b. For who are running on Windows with PulralEyes, HD Video -->WMV HD(*.wmv) on the dropdown menu is recommended.
Step 3. Click the "Convert" button on the main interface and the software will start to convert MXF to Pluraleyes friendly video formats immediately. When the conversion finishes, click "Open" to find the converted video files. Then you can effortless transfer the video files to Pluraleyes for editing.
Read More:
Related Software:
Pavtube HD Video Converter for Mac: Professional HD Video converter for converting HD Videos on Mac, provides the perfect solution to convert HD video to any HD/SD video format like MXF, AVCHD MTS/M2TS/TS, H.265, AVI, MOV, MP4, MPEG, FLV, MKV, WebM, M4V, etc. and vice versa on Mac. Running perfectly on Mac OS X Snow Leopard/Lion/Mountain Lion/Mavericks/Yosemite/El Capitan/macOS Sierra.
Pavtube Video Converter for Mac is blazing professional video conversion software, enabling you to convert any video formats like H.265, MP4, MOV, MTS, M2TS, TS, MPEG, FLV, AVI, MKV and more 300+ formats or YouTube/Vimeo/Facebook video, to 4K/HD 1080P video. It possesses high compatibility with portable iPhone, iPad, Apple TV, QuickTime, PS4, PS3 etc.
PluralEyes can synchronize a mixture of video and audio formats in a project. Footage from a wide variety of cameras and audio recording devices is supported. It is often helpful, but not required, for devices to have accurate time-of-day settings. Timecode recording is not necessary. If you attempt to add media file types that are incompatible, you will get a warning pop up at the top of the PluralEyes window. Take MXF as an example, though Pluraleyes support MXF, but you will still encounter some issues when importing MXF to Pluraleyes due to the MXF codec or other reasons.
So if you also have some problems importing and editing MXF with Pluraleyes 3.5/4, you can try converting MXF files to Pluraleyes supported formats and give it a whirl. Many users never had issues importing to PluralEyes and syncing with footages.
First you need to download Pavtube MXF Converter for Mac, an easy-to-use yet powerful high-quality MXF converter and editor (add subtitles to MXF, merge/split MXF etc) which is compatible with any Mac OS system. With this MXF to Pluraleyes converter, you can convert MXF (including Canon MXF) to Pluraleyes 3.5/4 friendly formats like MOV, WMV etc. Now I can use it to effortlessly transcode MXF to MOV/WMV for editing with PluralEyes. (read review)
PS: If you want to convert AVCHD MTS to Pluraleyes formats for editing, you can also try - Pavtube MTS/M2TS Converter.
Free download the MXF to Pluraleyes converter:
Other Download:
- Pavtube old official address: http://www.pavtube.com/mxf-converter-mac/
- AppStore Download: https://itunes.apple.com/us/app/pavtube-mxf-converter/id502807634?mt=12
- Cnet Download: http://download.cnet.com/Pavtube-MXF-Converter/3000-2194_4-76177789.html
Check out the video below for a step-by-step guide on how to import MXF video into PluralEyes
Step 1. Add MXF videos
Install and run the MXF to PluralEyes Converter on your computer, then click "Add Video" button to browse and load your rvideos.
Step 2. Click "Format" bar and choose a proper target format
a.If you are working with PulralEyes on Mac, you’re suggested selecting "Final Cut Pro >> Apple ProRes 422 (*.mov)" as output format for using MXF in PluralEyes with natively supported video codec.
b. For who are running on Windows with PulralEyes, HD Video -->WMV HD(*.wmv) on the dropdown menu is recommended.
Step 3. Click the "Convert" button on the main interface and the software will start to convert MXF to Pluraleyes friendly video formats immediately. When the conversion finishes, click "Open" to find the converted video files. Then you can effortless transfer the video files to Pluraleyes for editing.
Read More:
- MXF to Windows Movie Maker
- MXF to MOV
- MXF to Premiere Pro
- MXF to QuckTime
- MXF to iMovie
- MXF to ProRes
Related Software:
Pavtube HD Video Converter for Mac: Professional HD Video converter for converting HD Videos on Mac, provides the perfect solution to convert HD video to any HD/SD video format like MXF, AVCHD MTS/M2TS/TS, H.265, AVI, MOV, MP4, MPEG, FLV, MKV, WebM, M4V, etc. and vice versa on Mac. Running perfectly on Mac OS X Snow Leopard/Lion/Mountain Lion/Mavericks/Yosemite/El Capitan/macOS Sierra.
Pavtube Video Converter for Mac is blazing professional video conversion software, enabling you to convert any video formats like H.265, MP4, MOV, MTS, M2TS, TS, MPEG, FLV, AVI, MKV and more 300+ formats or YouTube/Vimeo/Facebook video, to 4K/HD 1080P video. It possesses high compatibility with portable iPhone, iPad, Apple TV, QuickTime, PS4, PS3 etc.
Wednesday, August 24, 2016
Load Nikon Coolpix A900 4K to DaVinci Resolve 12 for editing on El Capitan/macOS Sierra
Nikon Coolpix A900 captures at 30 frames per second (or 25p for PAL), and it records 4K video at Ultra HD (3840 x 2160) resolution. Other video options include Full HD video up to 60p and a high-speed 120fps capture mode, though this is limited to standard-definition 640 x 480 resolution. Want to import Nikon footage into DaVinci Resolve 12 for further editing?
From some forum, many a user has reported that they experienced similar issues when trying to edit some 4K MP4 video files recorded from Nikon Coolpix A900 camera in DaVinci Resolve 12, such as the importing process was very slow and the program even crashed. What’s matter with that?
According to Nikon Coolpix A900’s specifications, we can clearly see that the files on Nikon A900 are saved in MPEG-4 and H.264 format, wrapped with .mp4. But those H.264 (.mp4) videos are not well with DaVinci Resolve 12 so far, and thats why people always encounter problems when working A900 MP4 files with DaVinci Resolve. So you’d better convert your Nikon Coolpix A900 4K MP4 video to DaVinci Resolve 12 friendly formats on your computer.
Best 4K to DaVinci Resolve 12 video converter for Mac
Actually, the process is easy and can done well with the help of Pavtube HD Video Converter for Mac, capable of transforming Nikon Coolpix A900 4K video to DaVinci Resolve best format like DNXHD MOV with fast speed while keeping its pristine quality. Besides Nikon Coolpix A900, this excellent program also support other Nikon camcorders, such as Nikon D800, D4, D3S, D7000, D300S, etc fooatge for editing in FCP/iMovie/Premiere/Avid, etc. The following will introduce a detailed guide on how to convert Nikon Coolpix A900 H.264 MPEG-4 to FCP supported one.
Hot search:
Nikon Coolpix A900 4kAvid Media Composer ǀ Nikon Coolpix A900 4K to Windows Movie Maker ǀ Nikon Coolpix A900 4K to iMovie/FCE ǀ Nikon Coolpix A900 4K to Premiere Pro CC 2015.3 ǀ Nikon Coolpix A900 4K to FCP X
Other Download:
Step 1: Load source Nikon Coolpix A900 4K videos
Launch the Video Converter for Mac, and you may either click "Add video" button to import Nikon Coolpix A900 4K files, or directly drag and drop the files into this program. If you'd like to combine multiple Nikon Coolpix A900 4K files to be a single file, you can tick the checkbox "Merge into one file".
Step 2: Select Resolve 12 readable format
Click the "Format" to select output format. Choose "Avid Media Compose > Avid DNxHD(*.mov)" as the output format.
Tip: Before conversion, you can click the "Settings" icon to customize the video/audio settings including the Bitrate of Video and Audio, Audio, Video Size, Sample Rate, Frame Rate, Audio Channels, etc for iMovie, Final Cut Express.
Step 3: Converting Nikon Coolpix A900 4K video files to Davinci Resolve 12
After all the necessary setting have been done, click the "Convert" button at the bottom right corner to start transcoding Nikon Coolpix A900 4K to DNxHD .mov. Finally, launch Davinci Resolve. Find the file in the Library panel, and then double click your clip or Right-click and select "Add into Media Pool." Now the clip is added to your Media Pool. You can also import entire directors or a range of clips into the Media Pool.
Related Software:
Pavtube Video Converter for Mac is blazing professional video conversion software, enabling you to convert any video formats like H.265, MP4, MOV, MTS, M2TS, TS, MPEG, FLV, AVI, MKV and more 300+ formats or YouTube/Vimeo/Facebook video, to 4K/HD 1080P video. It possesses high compatibility with portable iPhone, iPad, Apple TV, QuickTime, etc.
Read More Guides:
From some forum, many a user has reported that they experienced similar issues when trying to edit some 4K MP4 video files recorded from Nikon Coolpix A900 camera in DaVinci Resolve 12, such as the importing process was very slow and the program even crashed. What’s matter with that?
According to Nikon Coolpix A900’s specifications, we can clearly see that the files on Nikon A900 are saved in MPEG-4 and H.264 format, wrapped with .mp4. But those H.264 (.mp4) videos are not well with DaVinci Resolve 12 so far, and thats why people always encounter problems when working A900 MP4 files with DaVinci Resolve. So you’d better convert your Nikon Coolpix A900 4K MP4 video to DaVinci Resolve 12 friendly formats on your computer.
Best 4K to DaVinci Resolve 12 video converter for Mac
Actually, the process is easy and can done well with the help of Pavtube HD Video Converter for Mac, capable of transforming Nikon Coolpix A900 4K video to DaVinci Resolve best format like DNXHD MOV with fast speed while keeping its pristine quality. Besides Nikon Coolpix A900, this excellent program also support other Nikon camcorders, such as Nikon D800, D4, D3S, D7000, D300S, etc fooatge for editing in FCP/iMovie/Premiere/Avid, etc. The following will introduce a detailed guide on how to convert Nikon Coolpix A900 H.264 MPEG-4 to FCP supported one.
Hot search:
Nikon Coolpix A900 4kAvid Media Composer ǀ Nikon Coolpix A900 4K to Windows Movie Maker ǀ Nikon Coolpix A900 4K to iMovie/FCE ǀ Nikon Coolpix A900 4K to Premiere Pro CC 2015.3 ǀ Nikon Coolpix A900 4K to FCP X
Other Download:
- Pavtube old official address: http://www.pavtube.com/hd-video-converter-mac/
- AppStore Download: https://itunes.apple.com/de/app/pavtube-hd-video-converter/id502792488?mt=12
- Cnet Download: http://download.cnet.com/Pavtube-HD-Video-Converter/3000-2194_4-76177786.html
Step 1: Load source Nikon Coolpix A900 4K videos
Launch the Video Converter for Mac, and you may either click "Add video" button to import Nikon Coolpix A900 4K files, or directly drag and drop the files into this program. If you'd like to combine multiple Nikon Coolpix A900 4K files to be a single file, you can tick the checkbox "Merge into one file".
Step 2: Select Resolve 12 readable format
Click the "Format" to select output format. Choose "Avid Media Compose > Avid DNxHD(*.mov)" as the output format.
Tip: Before conversion, you can click the "Settings" icon to customize the video/audio settings including the Bitrate of Video and Audio, Audio, Video Size, Sample Rate, Frame Rate, Audio Channels, etc for iMovie, Final Cut Express.
Step 3: Converting Nikon Coolpix A900 4K video files to Davinci Resolve 12
After all the necessary setting have been done, click the "Convert" button at the bottom right corner to start transcoding Nikon Coolpix A900 4K to DNxHD .mov. Finally, launch Davinci Resolve. Find the file in the Library panel, and then double click your clip or Right-click and select "Add into Media Pool." Now the clip is added to your Media Pool. You can also import entire directors or a range of clips into the Media Pool.
Related Software:
Pavtube Video Converter for Mac is blazing professional video conversion software, enabling you to convert any video formats like H.265, MP4, MOV, MTS, M2TS, TS, MPEG, FLV, AVI, MKV and more 300+ formats or YouTube/Vimeo/Facebook video, to 4K/HD 1080P video. It possesses high compatibility with portable iPhone, iPad, Apple TV, QuickTime, etc.
Read More Guides:
- No Audio Channels – Import Sony A7s MP4 to Resolve 10/11
- Importing AVI Files in to Davinci Resolve?
- How to Import Panasonic AG-DVX200 4K to FCP 7/X for Editing?
- Downscaling Blade Chroma 4K to 1080p on El Capitan/Windows 10
- Importing MKV to Windows Movie Maker in Windows 10 for nice editing
- How does Sony Vegas Pro 13 support 4K videos?
- Can’t play DJI Phantom 3 4K videos? Downscale 4K to 1080p on Mac
Wednesday, August 17, 2016
Importing MKV to Windows Movie Maker in Windows 10 for nice editing
MKV to Windows Movie Maker issues:
“I really need to find out how to import my .mkv files into Movie Maker. Can anyone please help me out?”
“i have some mkv files that i want to make into a music video, but every time i try to use windows movie maker to do so, it does not work at first. it would just say that it did not have the necessary codec to import the file. then a friend of mine told me to change the name of the file extension and i did it now. when i try to import the files it works but after separating the files into clips it freezes and then an error message come up. I’ve tried it with other videos and it works just fine. what i want to now is if there is a codec or codecs that i can use to make it work or if there's another movie maker program that i can use that can support these mkv files or if there is a program that could convert mkv to windows movie maker.”
You can make your movies differently by editing them on Windows Movie Maker. However, some movies, like MKV files, are not recognizable on Movie Maker. Don't let that format issue stop you from showing your creativity. To make MKV files compatible with Windows Movie, you'll just convert MKV to Windows Movie Maker supported formats like WMV or AVI.
Windows Movie Maker supported formats:
Windows Movie Maker supported input formats: .WMV/.ASF, .MPG (MPEG-1), .AVI (DV-AVI), .WMA, .WAV, and .MP3
Windows Movie Maker supported output formats: Earlier versions of Windows Movie Maker could only export video in Windows Media Video or DV AVI formats, or say, create DV AVI and WMV 8 files. Now it defaults H.264/MP4 as the export format.
Related Searches:
Best MKV to Windows Movie Maker Video Converter for Windows 10
Pavtube Video Converter is a totally free video converting program capable of converting MKV video to Windows Movie Maker best editable format on Windows 10 (compatible with Windows 10, Windows 8.1, Windows 8, Windows 7, Windows XP). Without plugin or toolbar, it is helpful for changing Canon, Sony, JVC and Panasonic HD camera videos or drones like DJI Phantom 4, DJI Phantom 3, Yuneec Typhoon H etc to Windows Movie Maker supported ASF, AVI, MPEG or WMV formats so as to import self-recorded videos to the Windows editing software. Even 1080p/4K multi-track videos are supported and the image quality can be well obtained via the built-in Built with High Quality Engine and De-interlacing Engine of this free Windows Movie Maker converter.
Before starting the conversion process, please free download Pavtube Video Converter on your windows PC (and if you have a Mac, download the Mac edition instead), install and open it when you like to use it.
Other Download:
- Pavtube old official address: http://www.pavtube.com/video_converter/
- Cnet Download: http://download.cnet.com/Pavtube-Video-Converter/3000-2194_4-75734821.html
Step-by-step Guide of Converting MKV to Windows Movie Maker on Windows 10
1. Load MKV videos
Install and run the program, then click Add Video button to load MKV video files that you want to convert from your computer. You can also directly drag the MP4 video files into the program.
Tips: To combine all MKV files, simply click the "Edit" menu to choose the "Merge Into One File" to combine all the added video files into one.
Step 2: Select output format and set destination folder
Click the pull down menu of "Format", then you will be able to select a Windows Movie Maker supported format from the output format profile, choose "HD Video">"WMV HD (*.wmv)" as your output format for editing HD video on Windows Movie Maker.
3. Start to convert MKV to WMV/AVI format
Click "Convert" to start the conversion from MKV to WMV/AVI for Windows Movie Maker. After video conversion, the video files are compatible with Windows Movie Maker.
Plus: If you have more video to editor issues, you can learn more tips from this page.
Read More:
“I really need to find out how to import my .mkv files into Movie Maker. Can anyone please help me out?”
“i have some mkv files that i want to make into a music video, but every time i try to use windows movie maker to do so, it does not work at first. it would just say that it did not have the necessary codec to import the file. then a friend of mine told me to change the name of the file extension and i did it now. when i try to import the files it works but after separating the files into clips it freezes and then an error message come up. I’ve tried it with other videos and it works just fine. what i want to now is if there is a codec or codecs that i can use to make it work or if there's another movie maker program that i can use that can support these mkv files or if there is a program that could convert mkv to windows movie maker.”
You can make your movies differently by editing them on Windows Movie Maker. However, some movies, like MKV files, are not recognizable on Movie Maker. Don't let that format issue stop you from showing your creativity. To make MKV files compatible with Windows Movie, you'll just convert MKV to Windows Movie Maker supported formats like WMV or AVI.
Windows Movie Maker supported formats:
Windows Movie Maker supported input formats: .WMV/.ASF, .MPG (MPEG-1), .AVI (DV-AVI), .WMA, .WAV, and .MP3
Windows Movie Maker supported output formats: Earlier versions of Windows Movie Maker could only export video in Windows Media Video or DV AVI formats, or say, create DV AVI and WMV 8 files. Now it defaults H.264/MP4 as the export format.
Related Searches:
- MXF to Windows Movie Maker
- MOV to Windows Movie Maker
- Tivo to Windows Movie Maker
- 4K to Windows Movie Maker
- AVI to Windows Movie Maker
- MP4 to Windows Movie Maker/Windows Movie Maker to MP4
Best MKV to Windows Movie Maker Video Converter for Windows 10
Pavtube Video Converter is a totally free video converting program capable of converting MKV video to Windows Movie Maker best editable format on Windows 10 (compatible with Windows 10, Windows 8.1, Windows 8, Windows 7, Windows XP). Without plugin or toolbar, it is helpful for changing Canon, Sony, JVC and Panasonic HD camera videos or drones like DJI Phantom 4, DJI Phantom 3, Yuneec Typhoon H etc to Windows Movie Maker supported ASF, AVI, MPEG or WMV formats so as to import self-recorded videos to the Windows editing software. Even 1080p/4K multi-track videos are supported and the image quality can be well obtained via the built-in Built with High Quality Engine and De-interlacing Engine of this free Windows Movie Maker converter.
Before starting the conversion process, please free download Pavtube Video Converter on your windows PC (and if you have a Mac, download the Mac edition instead), install and open it when you like to use it.
Other Download:
- Pavtube old official address: http://www.pavtube.com/video_converter/
- Cnet Download: http://download.cnet.com/Pavtube-Video-Converter/3000-2194_4-75734821.html
Step-by-step Guide of Converting MKV to Windows Movie Maker on Windows 10
1. Load MKV videos
Install and run the program, then click Add Video button to load MKV video files that you want to convert from your computer. You can also directly drag the MP4 video files into the program.
Tips: To combine all MKV files, simply click the "Edit" menu to choose the "Merge Into One File" to combine all the added video files into one.
Step 2: Select output format and set destination folder
Click the pull down menu of "Format", then you will be able to select a Windows Movie Maker supported format from the output format profile, choose "HD Video">"WMV HD (*.wmv)" as your output format for editing HD video on Windows Movie Maker.
3. Start to convert MKV to WMV/AVI format
Click "Convert" to start the conversion from MKV to WMV/AVI for Windows Movie Maker. After video conversion, the video files are compatible with Windows Movie Maker.
Plus: If you have more video to editor issues, you can learn more tips from this page.
Read More:
- Fix MKV and Oculus Rift Developers Kit Dk2 Incompatibility Issues
- MKV&Premiere Pro – Open MKV videos in Premiere Pro
- Good Advice on Playing MKV on Mac with QuickTime or iTunes?
- Can PS4 Accept and Play MKV Files?
- MXF files not importing into Vegas Pro Why?
- Edit Blade Chroma 4K in Windows Movie Maker on Windows 10
- iPhone videos won't load properly in GoPro Studio? - Solved!
Wednesday, August 10, 2016
Downscaling Blade Chroma 4K to 1080p on El Capitan/Windows 10
4K Ultra HD has become more prevalent than 1080P due to its superior viewing experience to full HD. And also our daily life is rife with 4K UHD videos, which generally come from some drones like Blade Chroma. Though 4K ultra HD sets the world on fire, there are still tons of stuff needed to be completed in 1080P, like video playback and editing.
How to solve Blade Chroma 4K UHD incompatibility issues?
It probably goes without saying that 4K Ultra HD video delivers superior viewing experience compared with 1080p video. However, most mobiles and players fail to play 4K UHD videos. Plus, the large file size of 4K videos and the video format would be the problem for 4K video playback. Thus, compressing 4K 4096x2160 or 3840x2160 to HD 1080P/720P with a proper 4K converter is a must-have option.
Top Best Blade Chroma 4K Video Converter Tool
To get the work done, Pavtube Video Converter is believed to get over the hurdles. Just like the way it is dealing with 1080p HD videos like convert 1080p to 720p, it is surely in the support of converting 4K UHD videos in any formats faultlessly in a flash. With it, you can convert the Blade Chroma 4K video to some popular editing tool like FCP X, Premiere Pro CC 2015.3, iMovie, DaVinci Resolve Lite, etc and websites like Youtube/Vimeo etc.
Also, this best 4K to 1080p video converter also support output format for Samsung Smart TV, Sony Bravia TV, Panasonic Viera TV, 4K/LED/LCD TV and more formats for playing. This Ultra HD Video Converter is also available to customize the output resolutions to any size (4K, 2K, 1080p, 720p) the users want. For those who want to convert/downscale 4K videos on Mac (El Capitan included), please turn to Pavtube Video Converter for Mac. Here is an easy-to-follow tutorial and to downsize your 4K footage to 1080p/720p video effortlessly.
Compatible with Windows 10, Windows 8.1, Windows 8, Windows 7, Windows XP
Other Download:
- Pavtube old official address: http://www.pavtube.com/video_converter/
- Cnet Download: http://download.cnet.com/Pavtube-Video-Converter/3000-2194_4-75734821.html
Compatible with Mac OS X 10.11 El Capitan, Mac OS X 10.10 Yosemite, 10.9 Mavericks, 10.8 Mountain Lion, 10.7 Lion, 10.6 Snow Leopard, 10.5 Leopard.
Other Download:
- Pavtube old official address: http://www.pavtube.com/video-converter-mac/
- Cnet Download: http://download.cnet.com/Pavtube-Video-Converter/3000-2194_4-76179460.html
How to Compress/Convert 4K UHD Video to 1080P/720P HD on Windows?
(Note: The Mac version is same with Windows)
STEP 1. Import Blade Chroma 4K files
After the installation, launch the 4K Converter; click "Add video" and load your 4K videos. This program supports batch conversion, so you can add multiple files into it at a time.
STEP 2. Choose Output Format
Click the "Format" drop down list to select a proper video foramt as you want. This video converter provides optimal profiles for kinds of editing programs and media devices, and you can also select a proper profile like Common Video MP4 as output format that best meets your needs.
STEP 3. Downsize Blade Chroma 4K Video Resolution to 1080p/720p
Click "Settings" button; you can adjust video and audio settings, including codec, aspect ratio, bit rate, frame rate, sample rate, and audio channel. To down-convert ultra HD 4K to 1080p/720p, do remember adjusting video size to 1920*1080 or 1280*720.
STEP 4. Start 4K to 1080p Conversion
Hit "Convert" button to start downscaling 4K to 1080P. It would take several minutes due to the file size. You can set "Shutdown converter after conversion" to do your other work. After the conversion, click Open to locate the generated 1080p/720p video.
Now it would be easier for you to playback and edit your 4K clips anywhere you want them. As we mentioned earlier, in addition to convert 4K Ultra HD videos including 4K camera videos, and web downloaded 4K videos, this 4K converter software also works as a reliable 4K editor with some simple edit functions like cropping, splitting, adding effects, inserting subtitles, etc. Have fun!
Read More:
Subscribe to:
Posts (Atom)